目录
- 备注:
- 知识点
- 远程仓库
- 本地和远程仓库
- github远程仓库添加密钥
- 添加远程仓库
- SSH警告
- 从GitHub远程仓库克隆
备注:
本文参考于廖雪峰老师的博客Git教程。依照其博客进行学习和记录,感谢其无私分享,也欢迎各位查看原文。
知识点
ssh-keygen -t rsa -C "youremail@example.com"生成SSh密钥对。私钥保存好,公钥可以添加到Git服务器(如GitHub远程仓库)- 添加或关联一个远程仓库,
git remote add origin git@server-name:path/repo-name.git - 第一次将本地仓库推送到远程master分支,
git push -u origin master - 本地提交后,将本地最新仓库推送到远程,
git push origin master - 克隆远程仓库,
git clone git@server-name:path/repo-name.git
远程仓库
Git是分布式版本控制系统,同一个Git仓库可以分布到不同机器上。一台机器上的原始版本库,可以被其他机器“克隆”,且每台机器的版本库都一样,没有主次之分。(一台电脑不同目录也可也组成远程仓库)
实际,一般是有一台服务器,每个人从这个服务器仓库克隆一份到自己电脑,并且可以提交自己的代码,或者从服务器仓库拉取别人的提交。
Github就是一个提供远程仓库托管服务的网站,通过github账号,就可以免费获得Git远程仓库。
本地和远程仓库
本地Git仓库和远程Github仓库之间的传输是通过SSH加密的
- 创建
SSH Key
创建SSH Key时,生成的公钥和私钥默认存放在用户主目录下,在用户主目录下(windows为c/Users/用户名/,linux为/home/用户目录/)会有一个.ssh目录,并且里面包含有id_rsa和id_rsa.pub两个文件。
- 打开终端(shell,windows下打开Git Bash),创建
SSH Key:
$ ssh-keygen -t rsa -C "youremail@example.com"
设置及密码等,直接回车保持默认即可,暂时不用对key设置密码(除非保密级别特别高)
此时,在用户主目录下找到.ssh目录,里面有id_rsa(私钥,不能泄露)和id_rsa.pub(公钥),这两个就是SSH Key的秘密对。
github远程仓库添加密钥
- 登陆
Github,点击头像,选择setting,打开SSH and GPG keys>SSH keys列表 - 然后点击“New SSH Key”,填上Title,在Key文本框里粘贴公钥
id_rsa.pub的内容
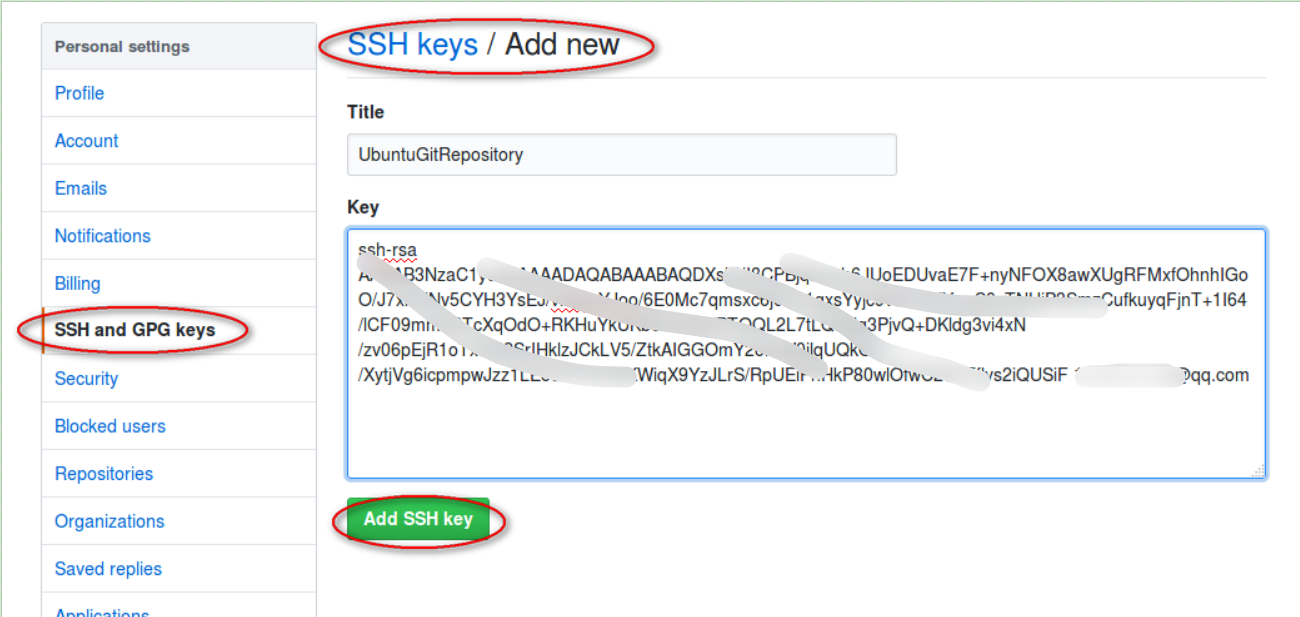
- 点“Add key”,将公钥添加到Github
- GitHub支持SSH协议,通过你添加的公钥,就可以确定代码的提交、远程连接、推送等不会被别人顶替
- Github允许添加多个Key,这样可以在多台电脑上远程连接github仓库、提交和推送代码等。
Github上托管的Git仓库,目前公开库可以被所有人查看,如果设置为私有库则只能自己查看修改
通过有条件,可以自己搭建Git服务器
添加远程仓库
本地已经存在一个Git仓库,通过将其连接到远程GitHub仓库,可以实现备份和远程同步(和写作)
- 登陆GItHub,点击“New repository”,新建一个仓库。填上仓库名、描述、public,点击“create repository”。
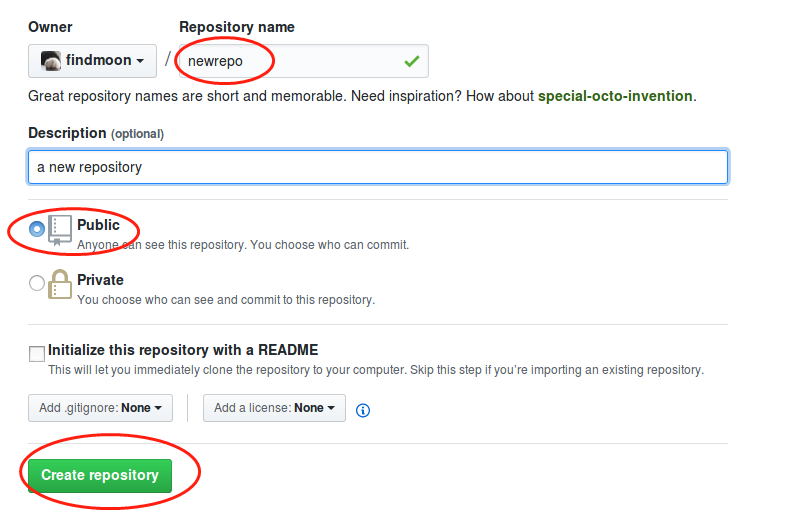
- 现在一个空的GItHub仓库已经创建完成。
如下所示,GitHub快速安装,有三个向导提示,可以在命令行创建一个新仓库、或者从本地推送一个已有的仓库、或者导入代码从一个仓库
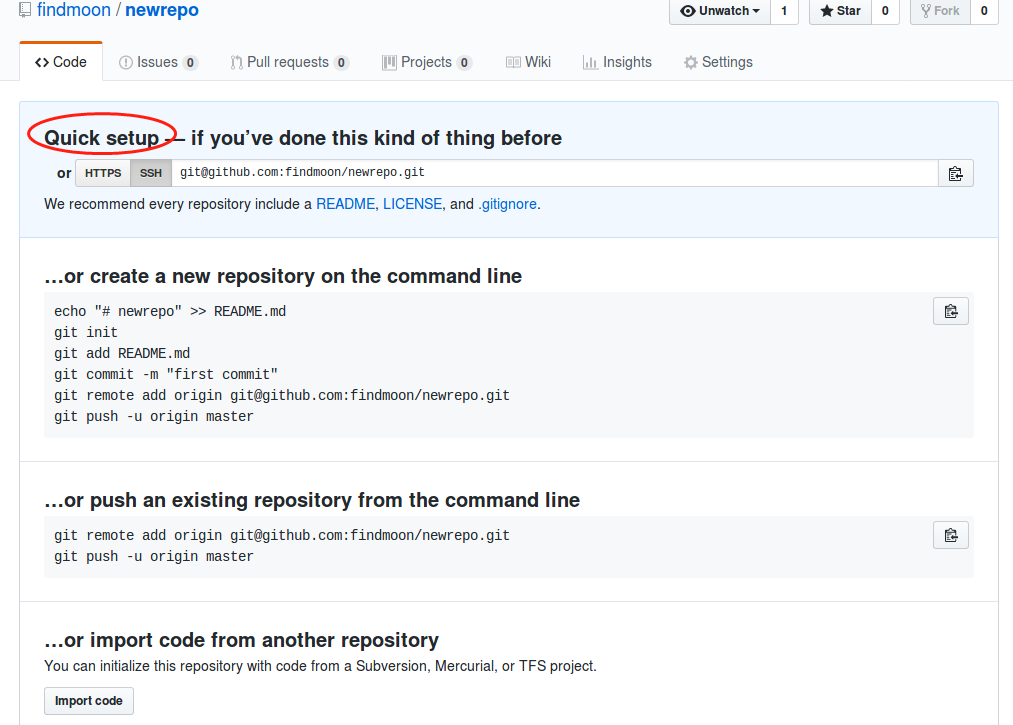
- 要把本地已有的仓库推送到远程,根据GitHub提示,在本地的
GitTest仓库目录下运行如下命令
$ git remote add origin git@github.com:findmoon/newrepo.git
本地仓库已经和远程仓库关联,实际上可以和任何远程仓库关联,但是如果SSH Key公钥不在GitHub的账户列表中,是无法推送的。
远程仓库的名字是origin,是Git默认的叫法。
- 把本地仓库的内容推送到远程仓库
$ git push -u origin master
The authenticity of host 'github.com (...)' can't be established.
RSA key fingerprint is ...
Are you sure you want to continue connecting (yes/no)? yes
Warning: Permanently added 'github.com,192.30.255.112' (RSA) to the list of known hosts.
对象计数中: 10, 完成.
Delta compression using up to 4 threads.
压缩对象中: 100% (7/7), 完成.
写入对象中: 100% (10/10), 845 bytes | 0 bytes/s, 完成.
Total 10 (delta 2), reused 0 (delta 0)
remote: Resolving deltas: 100% (2/2), done.
To git@github.com:findmoon/newrepo.git
 * [new branch]      master -> master
分支 master 设置为跟踪来自 origin 的远程分支 master。
git push命令实际上是把当前分支master推送到远程。
由于远程库是空的,我们第一次推送master分支时,加上了-u参数,Git不但会把本地的master分支内容推送到远程新的master分支,还会把本地的master分支和远程的master分支关联起来,在以后的推送或者拉取时就可以简化命令
- 查看远程仓库已经和本地一样
- 现在,只要本地仓库提交后,就可以直接推送到远程
$ git push origin master
这样,一个分布式版本库就完成了。
SSH警告
在第一次连接GitHub(clone或push),会有一个SSH的警告
The authenticity of host 'github.com (xx.xx.xx.xx)' can't be established.
RSA key fingerprint is xx.xx.xx.xx.xx.
Are you sure you want to continue connecting (yes/no)?
这是因为SSH连接在第一次验证GitHub服务器的key时,需要你确认GitHub的key的指纹信息是否真的来自GitHub服务器。
输入yes后,主机(你)就会把GitHub的key添加到本机的信任列表里面。这个警告只会出现一次。
从GitHub远程仓库克隆
开发时,可能会先创建远程库,然后从远程库克隆到本地
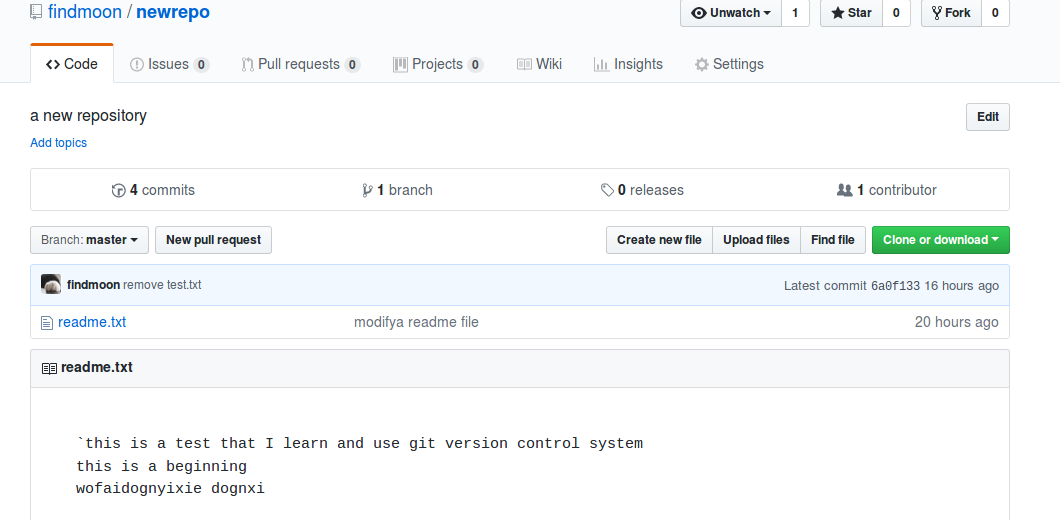
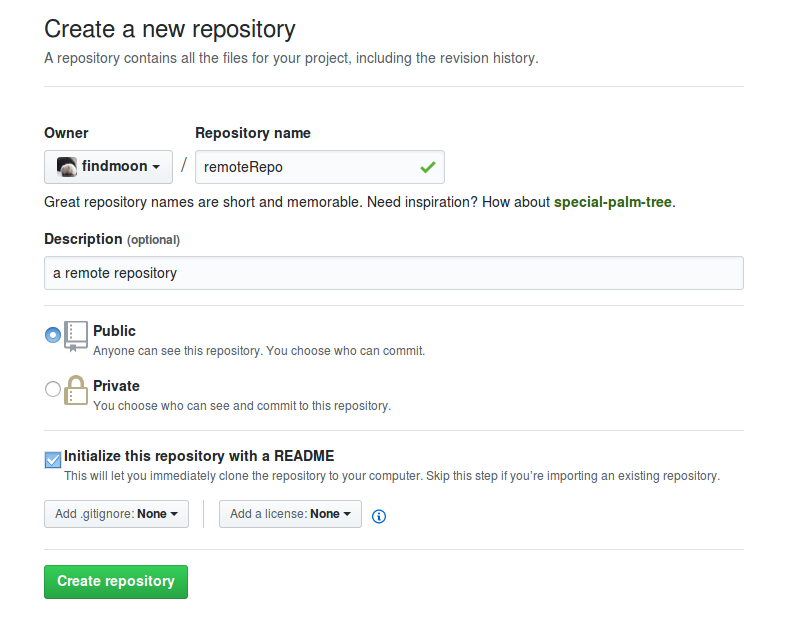
- 登陆GitHub,创建一个新仓库
remoteRepo(可以勾选Initialize this repository with a README,初始化readme文件)
- 创建完成后,新仓库包含readme文件
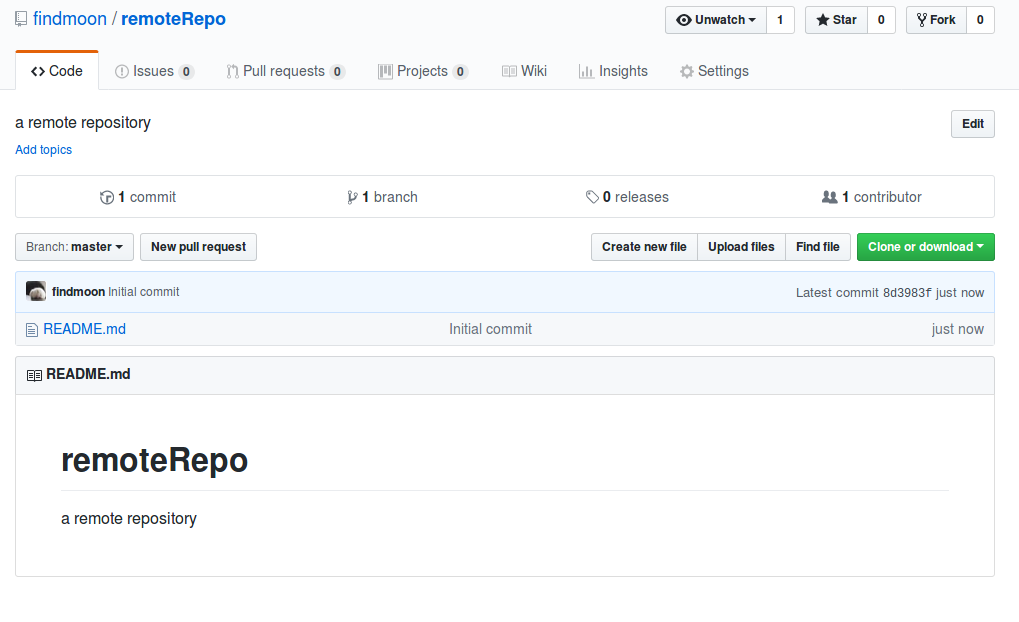
- 远程库已经创建完成,下一步可以用
git clone克隆到本地库。在仓库的中间右边,有一个Clone or download按钮,可以看到clone的地址
$ git clone git@github.com:findmoon/remoteRepo.git
正克隆到 'remoteRepo'...
Warning: Permanently added the RSA host key for IP address 'XXX' to the list of known hosts.
remote: Counting objects: 3, done.
remote: Total 3 (delta 0), reused 0 (delta 0), pack-reused 0
接收对象中: 100% (3/3), 完成.
检查连接... 完成。
clone完成后,远程仓库就被下载下来。可以进入目录查看
- git clone克隆也支持https协议,但是https每次都需要输入口令,且速度较慢