前言
开心一刻
一只被二哈带偏了的柴犬,我只想弄死隔壁的二哈

what:是什么
BeanFactoryPostProcessor接口很简单,只包含一个方法
/**
 * 通过BeanFactoryPostProcessor,我们自定义修改应用程序上下文中的bean定义
 *
 * 应用上下文能够在所有的bean定义中自动检测出BeanFactoryPostProcessor bean,
 * 并在任何其他bean创建之前应用这些BeanFactoryPostProcessor bean
 *
 * BeanFactoryPostProcessor对自定义配置文件非常有用,可以覆盖应用上下文已经配置了的bean属性
 *
 * PropertyResourceConfigurer就是BeanFactoryPostProcessor的典型应用
 * 将xml文件中的占位符替换成properties文件中相应的key对应的value
 */
@FunctionalInterface
public interface BeanFactoryPostProcessor {

    /**
     * 在应用上下文完成了标准的初始化之后,修改其内部的bean工厂
     * 将加载所有bean定义,但尚未实例化任何bean.
     * 我们可以覆盖或添加bean定义中的属性,甚至是提前初始化bean
     */
    void postProcessBeanFactory(ConfigurableListableBeanFactory beanFactory) throws BeansException;

}
推荐大家直接去读它的源码注释,说的更详细、更好理解
简单来说,BeanFactoryPostProcessor是spring对外提供的接口,用来拓展spring,能够在spring容器加载了所有bean的信息信息之后、bean实例化之前执行,修改bean的定义属性;有人可能会问,这有什么用?大家还记得spring配置文件中的占位符吗? 我们会在spring配置中配置PropertyPlaceholderConfigurer(继承PropertyResourceConfigurer)bean来处理占位符, 举个例子大家就有印象了
<?xml version="1.0" encoding="UTF-8"?>
<beans xmlns="http://www.springframework.org/schema/beans"
    xmlns:xsi="http://www.w3.org/2001/XMLSchema-instance" xmlns:context="http://www.springframework.org/schema/context"
    xsi:schemaLocation="http://www.springframework.org/schema/beans
     http://www.springframework.org/schema/beans/spring-beans.xsd
     http://www.springframework.org/schema/context
     http://www.springframework.org/schema/context/spring-context.xsd

    <bean id="propertyConfigurer" class="org.springframework.beans.factory.config.PropertyPlaceholderConfigurer">
        <property name="locations">
        <list>
            <value>classpath:mysqldb.properties</value>
        </list>
        </property>
    </bean>

    <bean id="dataSource" class="com.alibaba.druid.pool.DruidDataSource">
        <property name="driverClassName"value="${jdbc.driverClassName}" />
        <property name="url" value="${jdbc.url}" />
        <property name="username" value="${jdbc.username}"/>
        <property name="password"value="${jdbc.password}" />
    </bean>
</beans>
mysqldb.properties
jdbc.driverClassName=com.mysql.jdbc.Driver
jdbc.url=jdbc:mysql://192.168.1.100:3306/mybatis
jdbc.username=root
jdbc.password=root
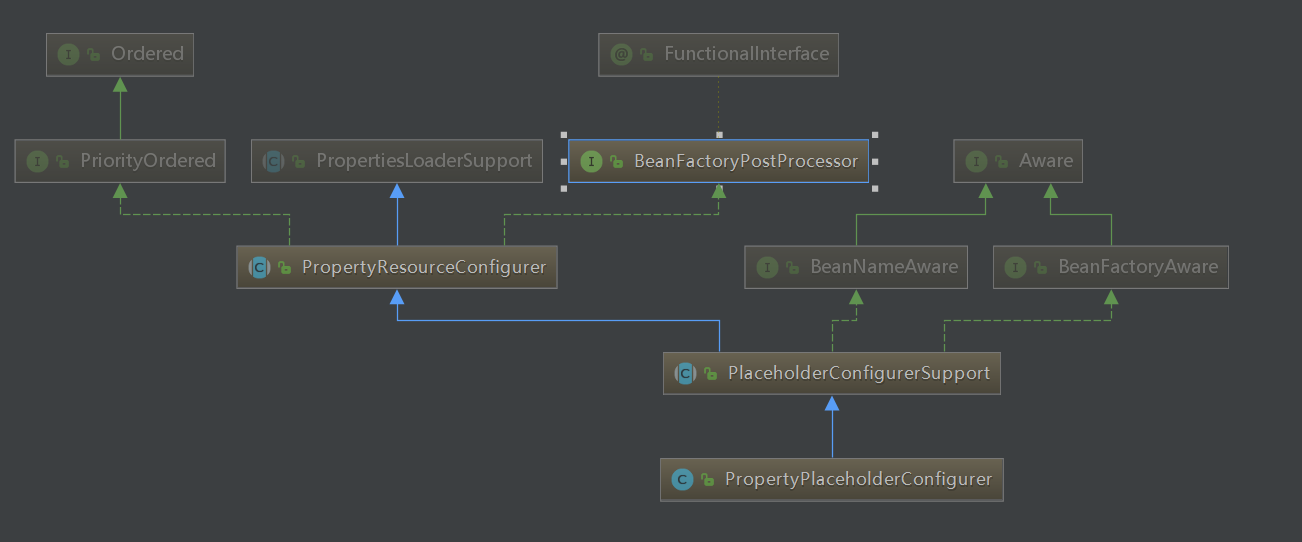
PropertyPlaceholderConfigurer类的继承关系图
how:怎么用
怎么用,这个问题比较简单,我们实现BeanFactoryPostProcessor接口,然后将将其注册到spring容器即可,在spring启动过程中,在常规bean实例化之前,会执行BeanFactoryPostProcessor的postProcessBeanFactory方法(里面有我们想要的逻辑),完成我们想要的操作;
重点应该是:用来干什么
上述占位符的例子是BeanFactoryPostProcessor的应用之一,但这是spring提供的BeanFactoryPostProcessor拓展,不是我们自定义的;实际工作中,自定义BeanFactoryPostProcessor的情况确实少,反正至少我是用的非常少的,但我还是有使用印象的,那就是对敏感信息的解密处理;上述数据库的连接配置中,用户名和密码都是明文配置的,这就存在泄漏风险,还有redis的连接配置、shiro的加密算法、rabbitmq的连接配置等等,凡是涉及到敏感信息的,都需要进行加密处理,信息安全非常重要
配置的时候以密文配置,在真正用到之前在spring容器中进行解密,然后用解密后的信息进行真正的操作,下面我就举个简单的例子,用BeanFactoryPostProcessor来完整敏感信息的解密
加解密工具类:DecryptUtil.java


package com.lee.app.util;

import org.apache.commons.lang3.StringUtils;
import sun.misc.BASE64Decoder;
import sun.misc.BASE64Encoder;

import javax.crypto.Cipher;
import javax.crypto.KeyGenerator;
import java.security.Key;
import java.security.SecureRandom;

public class DecryptUtil {

    private static final String CHARSET = "utf-8";
    private static final String ALGORITHM = "AES";
    private static final String RANDOM_ALGORITHM = "SHA1PRNG";

    public static String aesEncrypt(String content, String key) {

        if (content == null || key == null) {
            return null;
        }
        Key secretKey = getKey(key);
        try {
            Cipher cipher = Cipher.getInstance(ALGORITHM);
            cipher.init(Cipher.ENCRYPT_MODE, secretKey);
            byte[] p = content.getBytes(CHARSET);
            byte[] result = cipher.doFinal(p);
            BASE64Encoder encoder = new BASE64Encoder();
            String encoded = encoder.encode(result);
            return encoded;
        } catch (Exception e) {
            throw new RuntimeException(e);
        }
    }

    public static String aesDecrypt(String content, String key) {
        Key secretKey = getKey(key);
        try {
            Cipher cipher = Cipher.getInstance(ALGORITHM);
            cipher.init(Cipher.DECRYPT_MODE, secretKey);
            BASE64Decoder decoder = new BASE64Decoder();
            byte[] c = decoder.decodeBuffer(content);
            byte[] result = cipher.doFinal(c);
            String plainText = new String(result, CHARSET);
            return plainText;
        } catch (Exception e) {
            throw new RuntimeException(e);
        }
    }

    private static Key getKey(String key) {
        if (StringUtils.isEmpty(key)) {
            key = "hello!@#$world";// 默认key
        }
        try {
            SecureRandom secureRandom = SecureRandom.getInstance(RANDOM_ALGORITHM);
            secureRandom.setSeed(key.getBytes());
            KeyGenerator generator = KeyGenerator.getInstance(ALGORITHM);
            generator.init(secureRandom);
            return generator.generateKey();
        } catch (Exception e) {
            throw new RuntimeException(e);
        }
    }

    public static void main(String[] args) {
        // key可以随意取,DecryptConfig中decryptKey与此相同即可
        String newUserName= aesEncrypt("root", "hello!@#$world");   // QL34YffNntJi1OWG7zGqVw==
        System.out.println(newUserName);
        String originUserName = aesDecrypt(newUserName, "hello!@#$world");
        System.out.println(originUserName);

        String newPassword = aesEncrypt("123456", "hello!@#$world");   // zfF/EU6k4YtzTnKVZ6xddw==
        System.out.println(newPassword);
        String orignPassword = aesDecrypt(newPassword, "hello!@#$world");
        System.out.println(orignPassword);
    }
}
View Code
配置文件:application.yml


server:
  servlet:
    context-path: /app
  port: 8888
spring:
  #连接池配置
  datasource:
    type: com.alibaba.druid.pool.DruidDataSource
    druid:
      driver-class-name: com.mysql.jdbc.Driver
      url: jdbc:mysql://localhost:3306/mybatis?useSSL=false&useUnicode=true&characterEncoding=utf-8
      #Enc[:解密标志前缀,]:解密后缀标志,中间内容是需要解密的内容
      username: Enc[QL34YffNntJi1OWG7zGqVw==]
      password: Enc[zfF/EU6k4YtzTnKVZ6xddw==]
      initial-size: 1                     #连接池初始大小
      max-active: 20                      #连接池中最大的活跃连接数
      min-idle: 1                         #连接池中最小的活跃连接数
      max-wait: 60000                     #配置获取连接等待超时的时间
      pool-prepared-statements: true    #打开PSCache,并且指定每个连接上PSCache的大小
      max-pool-prepared-statement-per-connection-size: 20
      validation-query: SELECT 1 FROM DUAL
      validation-query-timeout: 30000
      test-on-borrow: false             #是否在获得连接后检测其可用性
      test-on-return: false             #是否在连接放回连接池后检测其可用性
      test-while-idle: true             #是否在连接空闲一段时间后检测其可用性
#mybatis配置
mybatis:
  type-aliases-package: com.lee.app.entity
  #config-location: classpath:mybatis/mybatis-config.xml
  mapper-locations: classpath:mapper/*.xml
# pagehelper配置
pagehelper:
  helperDialect: mysql
  #分页合理化,pageNum<=0则查询第一页的记录;pageNum大于总页数,则查询最后一页的记录
  reasonable: true
  supportMethodsArguments: true
  params: count=countSql
decrypt:
  prefix: "Enc["
  suffix: "]"
  key: "hello!@#$world"
View Code
工程中解密:DecryptConfig.java


package com.lee.app.config;

import com.lee.app.util.DecryptUtil;
import org.slf4j.Logger;
import org.slf4j.LoggerFactory;
import org.springframework.beans.BeansException;
import org.springframework.beans.factory.config.BeanFactoryPostProcessor;
import org.springframework.beans.factory.config.ConfigurableListableBeanFactory;
import org.springframework.boot.env.OriginTrackedMapPropertySource;
import org.springframework.context.EnvironmentAware;
import org.springframework.core.env.ConfigurableEnvironment;
import org.springframework.core.env.Environment;
import org.springframework.core.env.MutablePropertySources;
import org.springframework.core.env.PropertySource;
import org.springframework.stereotype.Component;

import java.util.LinkedHashMap;
import java.util.stream.Collectors;
import java.util.stream.StreamSupport;

/**
 * 敏感信息的解密
 */
@Component
public class DecryptConfig implements EnvironmentAware, BeanFactoryPostProcessor {

    private static final Logger LOGGER = LoggerFactory.getLogger(DecryptConfig.class);

    private ConfigurableEnvironment environment;

    private String decryptPrefix = "Enc[";                      // 解密前缀标志 默认值
    private String decryptSuffix = "]";                         // 解密后缀标志 默认值
    private String decryptKey = "hello!@#$world";               // 解密可以 默认值

    @Override
    public void setEnvironment(Environment environment) {
        this.environment = (ConfigurableEnvironment) environment;
    }

    @Override
    public void postProcessBeanFactory(ConfigurableListableBeanFactory beanFactory) throws BeansException {
        LOGGER.info("敏感信息解密开始.....");
        MutablePropertySources propSources = environment.getPropertySources();
        StreamSupport.stream(propSources.spliterator(), false)
                .filter(ps -> ps instanceof OriginTrackedMapPropertySource)
                .collect(Collectors.toList())
                .forEach(ps -> convertPropertySource((PropertySource<LinkedHashMap>) ps));
        LOGGER.info("敏感信息解密完成.....");
    }

    /**
     * 解密相关属性
     * @param ps
     */
    private void convertPropertySource(PropertySource<LinkedHashMap> ps) {
        LinkedHashMap source = ps.getSource();
        setDecryptProperties(source);
        source.forEach((k,v) -> {
            String value = String.valueOf(v);
            if (!value.startsWith(decryptPrefix) || !value.endsWith(decryptSuffix)) {
                return;
            }
            String cipherText = value.replace(decryptPrefix, "").replace(decryptSuffix, "");
            String clearText = DecryptUtil.aesDecrypt(cipherText, decryptKey);
            source.put(k, clearText);
        });
    }

    /**
     *  设置解密属性
     * @param source
     */
    private void setDecryptProperties(LinkedHashMap source) {
        decryptPrefix = source.get("decrypt.prefix") == null ? decryptPrefix : String.valueOf(source.get("decrypt.prefix"));
        decryptSuffix = source.get("decrypt.suffix") == null ? decryptSuffix : String.valueOf(source.get("decrypt.suffix"));
        decryptKey = source.get("decrypt.key") == null ? decryptKey : String.valueOf(source.get("decrypt.key"));
    }
}
View Code
主要就是3个文件,DecryptUtil对明文进行加密处理后,得到的值配置到application.yml中,然后工程启动的时候,DecryptConfig会对密文进行解密,明文信息存到了spring容器,后续操作都是在spring容器的明文上进行的,所以与我们平时的不加密的结果一致,但是却对敏感信息进行了保护;工程测试结果如下:
完整工程地址:spring-boot-BeanFactoryPostProcessor
有兴趣的可以去看下jasypt-spring-boot的源码,你会发现他的原理是一样的,也是基于BeanFactoryPostProcessor的拓展
why:为什么能这么用
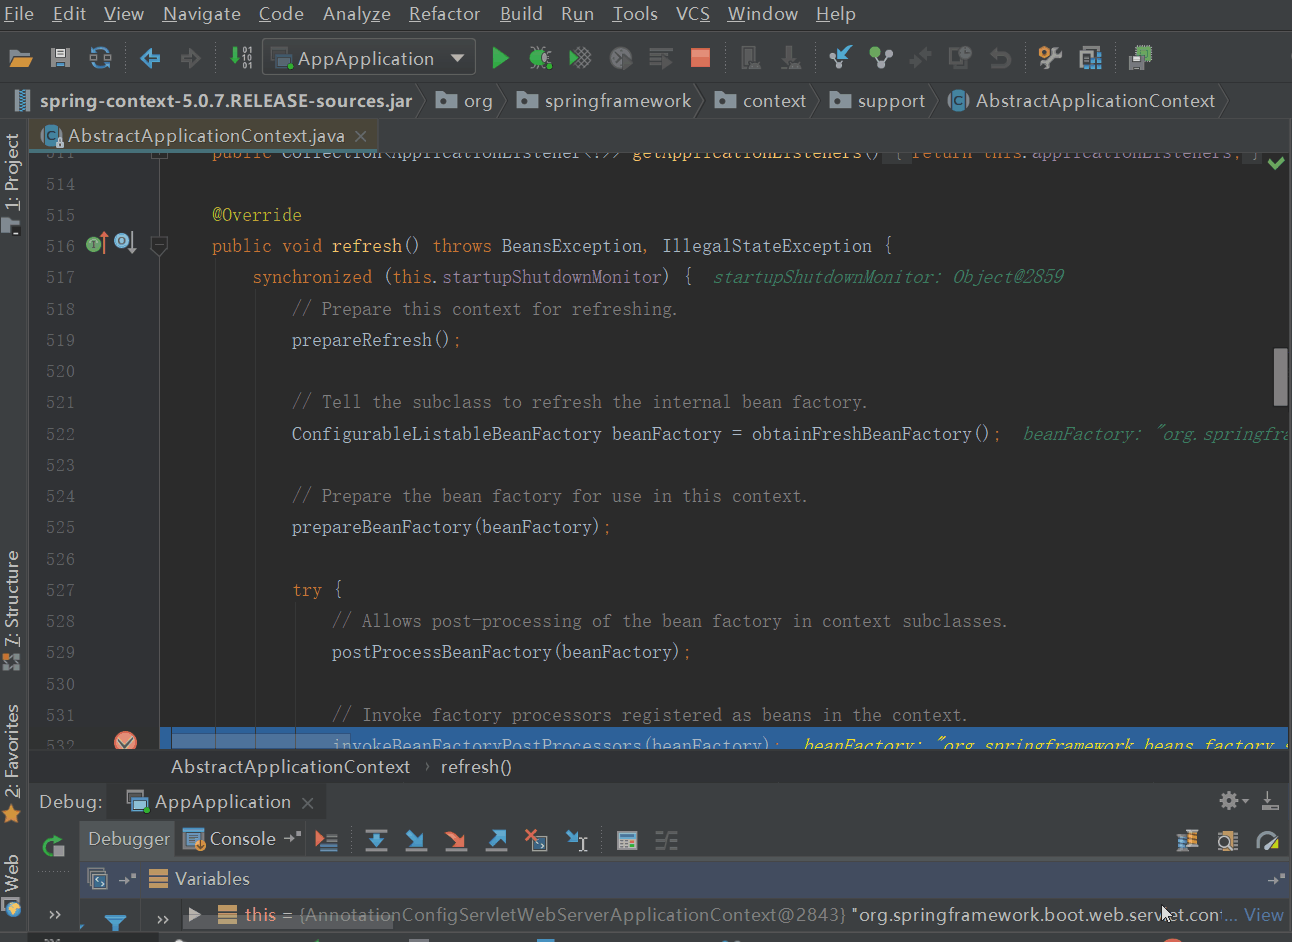
为什么DecryptConfig实现了BeanFactoryPostProcessor,将DecryptConfig注册到spring之后,DecryptConfig的postProcessBeanFactory方法就会执行?事出必有因,肯定是spring启动过程中会调用DecryptConfig实例的postProcessBeanFactory方法,具体我们来看看源码,我们从AbstractApplicationContext的refresh方法开始
不得不说,spring的命名、注释确实写得好,很明显我们从refresh中的invokeBeanFactoryPostProcessors方法开始,大家可以仔细看下PostProcessorRegistrationDelegate.invokeBeanFactoryPostProcessors方法,先按PriorityOrdered、Ordered、普通(没有实现PriorityOrdered和Ordered接口)的顺序调用BeanDefinitionRegistryPostProcessor,然后再按先按PriorityOrdered、Ordered、普通的顺序调用BeanFactoryPostProcessor,这个顺序还是值得大家注意下的,如果我们自定义的多个BeanFactoryPostProcessor有顺序之分,而我们又没有指定其执行顺序,那么可能出现的不是我们想要的结果
这里可能会有会有人有这样的的疑问:bean定义(BeanDefinition)是在什么时候加载到spring容器的,如何保证BeanFactoryPostProcessor实例起作用之前,所有的bean定义都已经加载到了spring容器
ConfigurationClassPostProcessor实现了BeanDefinitionRegistryPostProcessor,在springboot的createApplicationContext阶段注册到spring容器的,也就是说在spring的refresh之前就有了ConfigurationClassPostProcessor实例;ConfigurationClassPostProcessor被应用的时候(调用其postProcessBeanDefinitionRegistry方法),会加载全部的bean定义(包括我们自定义的BeanFactoryPostProcessor实例:DecryptConfig)到spring容器,bean的加载详情可查看:springboot2.0.3源码篇 – 自动配置的实现,是你想象中的那样吗,那么在应用BeanFactoryPostProcessor实例之前,所有的bean定义就已经加载到spring容器了,BeanFactoryPostProcessor实例也就能修改bean定义了
至此,BeanFactoryPostProcessor的机制我们就清楚了,为什么能这么用这个问题也就明了了
总结
1、BeanFactoryPostProcessor是beanFactory的后置处理器接口,通过BeanFactoryPostProcessor,我们可以自定义spring容器中的bean定义,BeanFactoryPostProcessor是在spring容器加载了bean的定义信息之后、bean实例化之前执行;
2、BeanFactoryPostProcessor类型的bean会被spring自动检测,在常规bean实例化之前被spring调用;
3、BeanFactoryPostProcessor的常用场景包括spring中占位符的处理、我们自定义的敏感信息的解密处理,当然不局限与此;
其实只要我们明白了BeanFactoryPostProcessor的生效时机,哪些场景适用BeanFactoryPostProcessor也就很清楚了