一、核心标签
JSTL包含五类核心标记库,在使用标记库之前,需要用taglib指令和uri属性来指定要使用的标记库。JSTL的使用可以处理JSP的逻辑代码部分,使代码更加高效、美观、整洁、易读。
1、JSTL的使用:
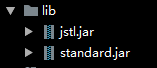
(1)需要先导入jar包(放在WEB-INF目录下的lib文件夹中):
(2)使用taglib指令和uri属性来指定要使用的标记库:
<%@taglib prefix="c" uri="http://java.sun.com/jsp/jstl/core"%> <%--导入核心标签库--%>
2、out标记,类似于脚本中的<%= %>:
(1)value属性:
<c:out value="使用JSTL的out标记完成输出"></c:out>

c开头表示核心(core)标签。
(2)escapeXml属性:
<c:out value=">" escapeXml="${false}"></c:out>

是否要进行特殊字符的转换,false为转换,默认为true。
(3)default属性:
<c:out value="${null}" default="value为空"></c:out>
如果value值为空,则显示default内的内容。
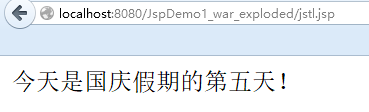
(4)jstl标记与el同时使用:
<body>
<%request.setAttribute("str","今天是国庆假期的第五天!");%>
<c:out value="${str}"></c:out>
</body>
3、set标记:
<body>
<c:set var="nihao" value="pageContext" scope="page"></c:set>
<c:set var="nihao" value="request" scope="request"></c:set>
<c:set var="nihao" value="session" scope="session"></c:set>
<c:set var="nihao" value="application" scope="application"></c:set>

<c:out value="${pageScope.nihao}"></c:out>
<c:out value="${requestScope.nihao}"></c:out>
<c:out value="${sessionScope.nihao}"></c:out>
<c:out value="${applicationScope.nihao}"></c:out>
</body>

4、remove标记:
<body>
<c:set var="nihao" value="pageContext" scope="page"></c:set>
<c:set var="nihao" value="request" scope="request"></c:set>
<c:set var="nihao" value="session" scope="session"></c:set>
<c:set var="nihao" value="application" scope="application"></c:set>

<c:remove var="nihao" scope="page"></c:remove>

<c:out value="${pageScope.nihao}"></c:out>
<c:out value="${requestScope.nihao}"></c:out>
<c:out value="${sessionScope.nihao}"></c:out>
<c:out value="${applicationScope.nihao}"></c:out>
</body>
删除指定域的数据。
5、catch标记:
打印网页中的错误信息:
<body>
<c:catch var="exception">
    <%
int[] a={1,2,3};
int b=0;
for(int i=0;i<4;i++){
    b=b+a[i];
    out.print(b);
}
    %>
</c:catch>
<c:out value="${exception}"></c:out>
</body>

二、逻辑处理
6、逻辑处理
El可以从不同的域取出数据,但是不能进行逻辑处理,JSTL标签能通过:if、choose、when、otherwise进行条件控制。
(1)
表单提交数据:
<body bgcolor="#00ffff">
<center>
    <h3>注册</h3>
    <form action="${pageContext.request.contextPath}/jstl.jsp" method="post">
        用户名:<input type="text" name="account" size="12"><br><br>
            密码:<input type="password" name="password" size="12"><br>
        <input type="submit" value="注册">
        <input type="reset" value="取消">
    </form>
</center>
</body>
<body>
<%
String account=request.getParameter("account");
request.setAttribute("account",account);
%>

<c:if test="${requestScope.account=='zhai'}">
<h4>登录成功</h4>
</c:if>

<c:if test="${!(requestScope.account=='zhai')}">
<h4>登录失败</h4>
</c:if>
</body>
注意事项:对于EL标签内的字符串判断是否相等,不能用equals()方法,直接用==,即可。JSTL中没有if…….else语句。
(2)
<%@ page contentType="text/html;charset=UTF-8" language="java" %>
<%@taglib prefix="c" uri="http://java.sun.com/jsp/jstl/core"%> <%--导入核心标签库--%>
<%@ page import="java.util.Date"%>
<%@ page import="java.util.Calendar" %>
<html>
<head>
    <title>jstl</title>
</head>
<body>
<%
Calendar calendar=Calendar.getInstance();
Integer hour=new Integer(calendar.get(Calendar.HOUR_OF_DAY));
Date date=calendar.getTime();
    request.setAttribute("hour",hour);
    request.setAttribute("date",date); %> <c:choose> <c:when test="${hour>=0&&hour<=11}"> <c:set var="hello" value="上午好!"></c:set> </c:when> <c:when test="${hour>=12&&hour<=17}"> <c:set var="hello" value="下午好!"></c:set> </c:when> <c:otherwise> <c:set var="hello" value="晚上好"></c:set> </c:otherwise> </c:choose> <c:out value="现在时间:${requestScope.date}"></c:out><br> <c:out value="${hello}"></c:out> </body> </html>
因为用到了Calender类,因此在对时间处理的时候,需要导入包,标签与switch…….case相似。
三、forEach标签
1、forEach标签的简单使用:
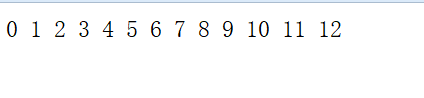
(1)未设置步长属性时,默认步长为1:
<c:forEach var="number" begin="0" end="12">
    <c:out value="${number}"></c:out>
</c:forEach>
(2)设置步长属性后,步长改变:
<c:forEach var="number" begin="0" end="12" step="2">
    <c:out value="${number}"></c:out>
</c:forEach>
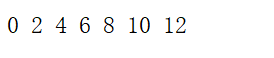
从0到12输出,需要运用到begin和end属性。
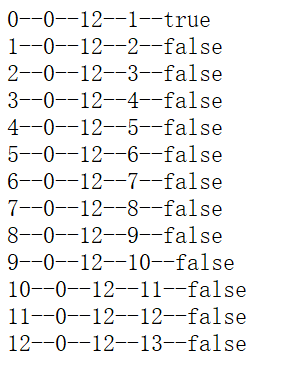
(3)varStatus属性的使用:
<c:forEach var="number" begin="0" end="12" varStatus="vs">
    <c:out value="${number}--${vs.begin}--${vs.end}--${vs.count}--${vs.first}"></c:out><br>
</c:forEach>
2、遍历ArrayList集合:
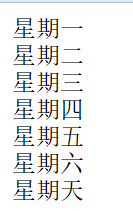
(1)forEach遍历集合(ArrayList集合存储字符串):
<body>
<%
    ArrayList<String> string=new ArrayList<String>();
    string.add("星期一");
    string.add("星期二");
    string.add("星期三");
    string.add("星期四"); string.add("星期五"); string.add("星期六"); string.add("星期天"); request.setAttribute("string",string); %> <c:forEach items="${requestScope.string}" var="str"> <c:out value="${str}"></c:out><br> </c:forEach> </body>
先向ArrayList集合中添加元素,再将ArrayList集合添加到request域,使用forEach指明要遍历的集合来自哪个域,并将每一个元素分别输出(str代表每一个数据,即:当次循环所对应的值)。
(2)遍历存储了学生对象的集合:
建立javabean:
package pers.zhb.domain;

public class Student {
    private String name;
    private int age;
    private String sex;
    public String getName() { return name; } public void setName(String name) { this.name = name; } public int getAge() { return age; } public void setAge(int age) { this.age = age; } public String getSex() { return sex; } public void setSex(String sex) { this.sex = sex; } @Override public String toString() { return "Student{" + "name='" + name + '\'' + ", age=" + age + ", sex='" + sex + '\'' + '}'; } }
遍历集合中的对象:
<body>
<%
   ArrayList<Student> students=new ArrayList<Student>();
   Student student1=new Student();
   student1.setSex("男");
   student1.setAge(12);
   student1.setName("mill"); students.add(student1); Student student2=new Student(); student2.setSex("女"); student2.setAge(23); student2.setName("莉莉"); students.add(student2); request.setAttribute("student",students); %> <c:forEach items="${requestScope.student}" var="stu"> <c:out value="${stu}"></c:out><br> </c:forEach> </body>

3、遍历Map集合:
(1)键和值都为String类型:
<body>
<%
    Map<String, String> map = new HashMap<String, String>();
    map.put("河南", "郑州");
    map.put("北京", "北京");
    session.setAttribute("provincialCapital",map);
%>
<c:forEach items="${sessionScope.provincialCapital}" var="province">
    <c:out value="${province.key}:${province.value}"></c:out>
</c:forEach>
</body>
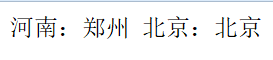
var为当次循环所对应的值。
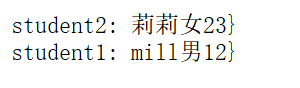
(2)遍历值为Student对象的Map集合:
<body>
<%
    ArrayList<Student> students=new ArrayList<Student>();
    Student student1=new Student();
    student1.setSex("男");
    student1.setAge(12);
    student1.setName("mill"); students.add(student1); Student student2=new Student(); student2.setSex("女"); student2.setAge(23); student2.setName("莉莉"); students.add(student2); Map<String, Student> map = new HashMap<String, Student>(); map.put("student1", student1); map.put("student2", student2); session.setAttribute("studentsMap",map); %> <c:forEach items="${sessionScope.studentsMap}" var="student"> <c:out value="${student.key}: ${student.value.getName()}${student.value.getSex()}${student.value.getAge()}}"></c:out><br> </c:forEach> </body>