如何实现动态装配一组Bean?
前言
@Enable*是 Spring 3.X 产生的注解,Spring Framework 3.0是一个里程碑的时代,其中之一就是取代xml配置方式。
@Enable*的作用:自动完成相关组件的bean的装配
@EnableScheduling实验
下面我们以@EnableScheduling为例,研究一下,Enable模块驱动到底如何将所需的bean注入到容器中的。
首先,我们创建一个TaskConfig类,并在配置类上加@EnableScheduling注解:
@ComponentScan("com.example.springboot.demo")
@EnableScheduling
@Configuration
public class TaskConfiguration {
}
然后创建TaskService类,测试定时任务
@Service
public class TaskService {
    @Scheduled(fixedRate = 3000)
    public void reportCurrentTime(){
        System.out.println("current Time:"+new Date());
    }
}
最后创建启动类
public class TaskMain {
    public static void main(String[] args) {
        ApplicationContext applicationContext=new AnnotationConfigApplicationContext(TaskConfiguration.class);
    }
}
以上3个类均在同一个包下。
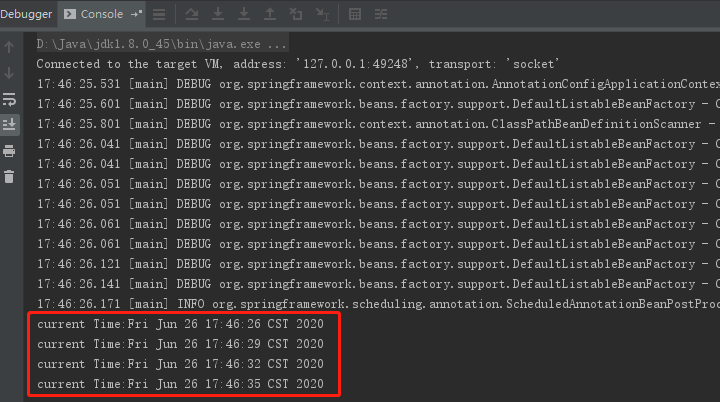
下面我们看一下执行结果:
@EnableScheduling原理
首先,我们到@EnableScheduling里面看下,注解是如何定义的
@Target(ElementType.TYPE)
@Retention(RetentionPolicy.RUNTIME)
@Import(SchedulingConfiguration.class)
@Documented
public @interface EnableScheduling {

}
在@EnableScheduling中,通过@Import注解导入定时任务的配置类SchedulingConfiguration。
@Configuration
@Role(BeanDefinition.ROLE_INFRASTRUCTURE)
public class SchedulingConfiguration {

   @Bean(name = TaskManagementConfigUtils.SCHEDULED_ANNOTATION_PROCESSOR_BEAN_NAME)
   @Role(BeanDefinition.ROLE_INFRASTRUCTURE)
   public ScheduledAnnotationBeanPostProcessor scheduledAnnotationProcessor() {
      return new ScheduledAnnotationBeanPostProcessor();
   }

}
在SchedulingConfiguration类中,通过@Bean将定时任务注解处理的实例注入到容器中,因此TaskService中@Scheduled(fixedRate = 3000)会定时3秒执行一次。
@Import详解
在应用中,有时没有把某个类注入到IOC容器中,但在运用的时候需要获取该类对应的bean,此时就需要用到@Import注解。
直接导入类
首先,创建两个类,不用注解注入到IOC容器中,在应用的时候再导入到当前容器中。
Dog类:
public class Dog {
}
Cat类:
public class Cat {
}
然后,创建配置类,在配置类中需要获取Dog和Cat类,需要用到@Import注解将这2个类注入到当前容器中。
@Import({Dog.class, Cat.class})
@Configuration
public class ImportConfig {
}
创建启动类,测试Cat和Dog是否注入到了容器中
public class MainTest {
    public static void main(String[] args) {
        AnnotationConfigApplicationContext applicationContext = new AnnotationConfigApplicationContext(ImportConfig.class);
        System.out.println(applicationContext.getBean(Dog.class));
        System.out.println(applicationContext.getBean(Cat.class));
    }
}
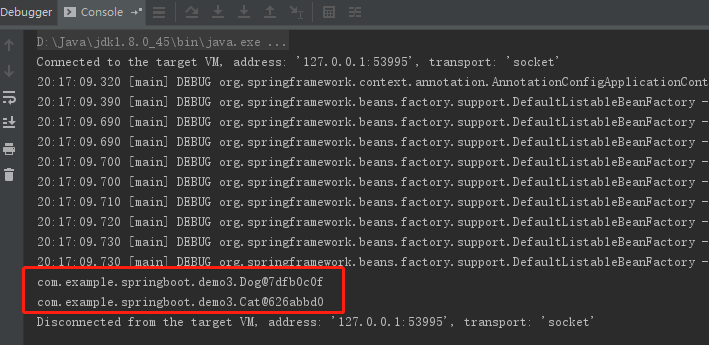
执行结果:
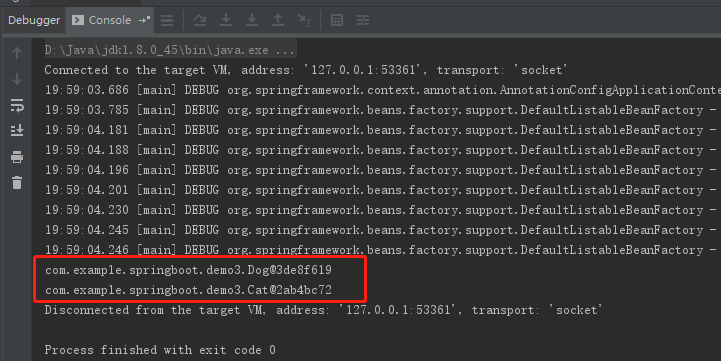
事实证明,已经注入到了容器中。
导入配置类
现在在一个配置类中进行配置bean,然后在需要的时候,只需要导入这个配置就可以了,最后输出结果相同。
MyConfig 配置类:
public class MyConfig {

    @Bean
    public Dog dog() {
        return new Dog();
    }

    @Bean
    public Cat cat() {
        return new Cat();
    }
}
当前配置类:
// MyConfig、Dog、Cat都将注入到容器中
@Import(MyConfig.class)
@Configuration
public class ImportConfig {
}
启动类:
public class MainTest {
    public static void main(String[] args) {
        AnnotationConfigApplicationContext applicationContext = new AnnotationConfigApplicationContext(ImportConfig.class);
        System.out.println(applicationContext.getBean(Dog.class));
        System.out.println(applicationContext.getBean(Cat.class));
    }
}
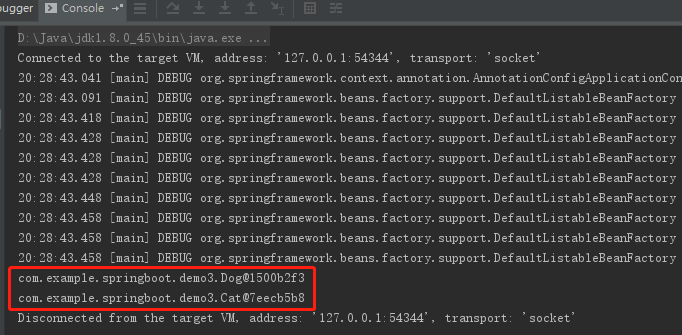
执行结果:
自定义@EnableMyConfig
通过分析@EnableScheduling和@Import,自定义@EnableMyConfig加强理解。
@Target(ElementType.TYPE)
@Retention(RetentionPolicy.RUNTIME)
@Import(MyConfig.class)
public @interface EnableMyConfig {
}
在当前配置类中加上@EnableMyConfig注解,测试结果同@Import作用在当前配置类结果一样。
@EnableMyConfig
@Configuration
public class ImportConfig {
}
启动类:
public class MainTest {
    public static void main(String[] args) {
        AnnotationConfigApplicationContext applicationContext = new AnnotationConfigApplicationContext(ImportConfig.class);
        System.out.println(applicationContext.getBean(Dog.class));
        System.out.println(applicationContext.getBean(Cat.class));
    }
}
执行结果:
总结
- 在当前项目配置类中通过
@Enable*注解引入需要的模块 - Enable中都会将各模块中的配置类通过
@Import导入到当前项目配置类