环境篇:Virtualbox+Vagrant安装Centos7

1 安装Vagrant
Vagrant下载地址:https://www.vagrantup.com/
Vagrant百度网盘:https://pan.baidu.com/s/1jqnMml024niqWQPbrGVuJw提取码:xv8h
傻瓜安装即可
vagrant -v 查看版本

2 下载virtualbox.box镜像
virtualbox.box百度网盘:https://pan.baidu.com/s/1EBrysc13fd0qf9EbT5rKdw提取码:1dk4
3 安装Virtualbox
virtualbox下载地址:https://www.virtualbox.org
virtualbox百度网盘:https://pan.baidu.com/s/1InyLZ-8Zmjuj7Qyk0Qg1Uw提取码:ewty
傻瓜安装即可,注意和Vagrant有版本兼容问题
4 安装centos7
4.1 添加本地centos/7镜像
找到下载好的virtualbox.box文件目录
使用
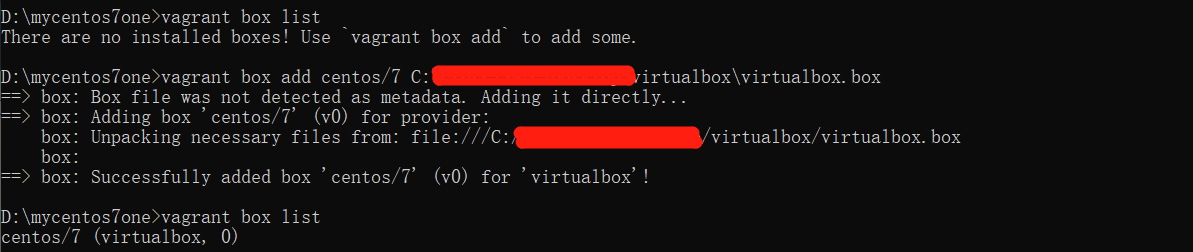
vagrant box add centos/7 C:\Users\SMZC\Desktop\virtualbox\virtualbox.box添加vagrant镜像使用
vagrant box list查询镜像

4.2 创建虚拟机环境
1、 新建一个文件夹,并进入命令行cmd
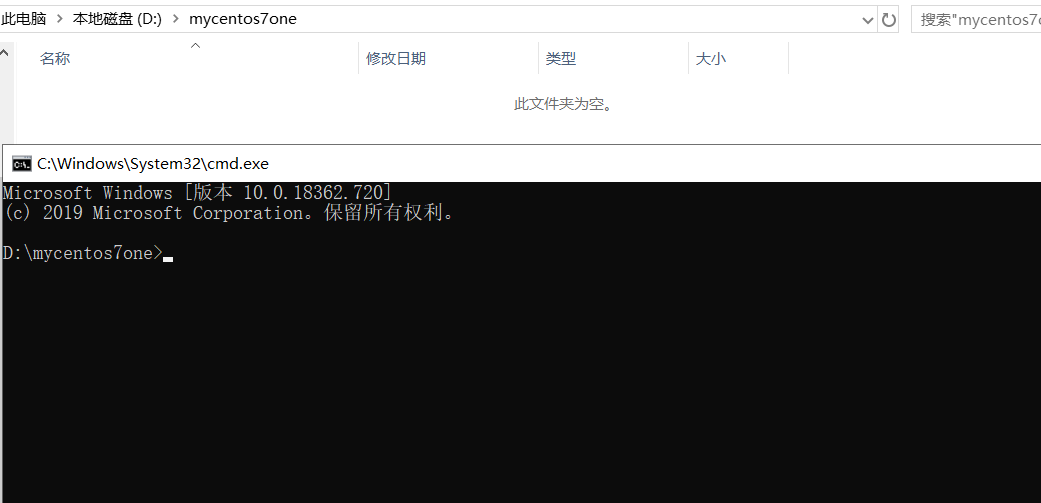
1、 使用vagrant init命令
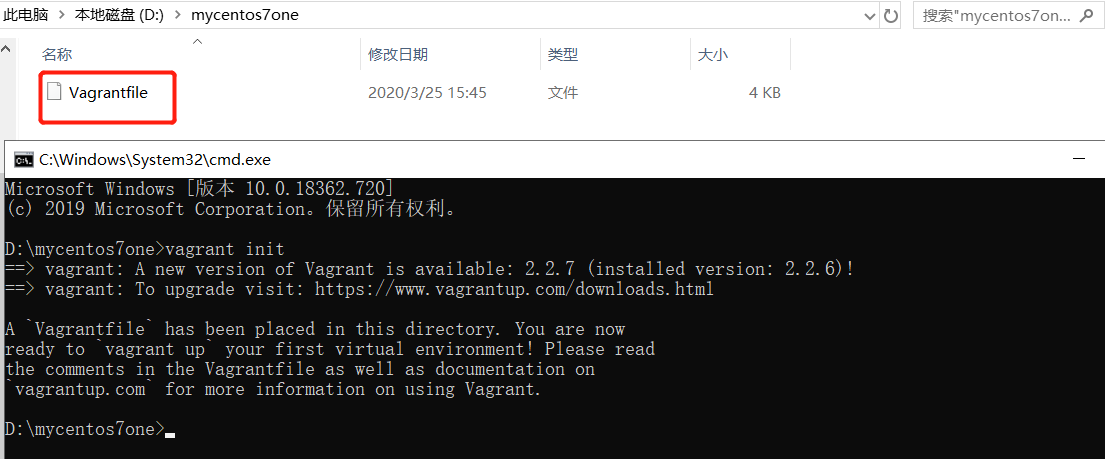
1、 修改Vagrantfile文件
# -*- mode: ruby -*-
# vi: set ft=ruby :

# All Vagrant configuration is done below. The "2" in Vagrant.configure
# configures the configuration version (we support older styles for
# backwards compatibility). Please don't change it unless you know what
# you're doing.
Vagrant.configure("2") do |config|
  # The most common configuration options are documented and commented below.
  # For a complete reference, please see the online documentation at
  # https://docs.vagrantup.com.

  # Every Vagrant development environment requires a box. You can search for
  # boxes at https://vagrantcloud.com/search.
  #拉取镜像centos/7
  config.vm.box = "centos/7"

  # Disable automatic box update checking. If you disable this, then
  # boxes will only be checked for updates when the user runs
  # `vagrant box outdated`. This is not recommended.
  # config.vm.box_check_update = false

  # Create a forwarded port mapping which allows access to a specific port
  # within the machine from a port on the host machine. In the example below,
  # accessing "localhost:8080" will access port 80 on the guest machine.
  # NOTE: This will enable public access to the opened port
  # config.vm.network "forwarded_port", guest: 80, host: 8080
  #采用桥接网络,共享主机网络
  config.vm.network "public_network"

  # Create a forwarded port mapping which allows access to a specific port
  # within the machine from a port on the host machine and only allow access
  # via 127.0.0.1 to disable public access
  # config.vm.network "forwarded_port", guest: 80, host: 8080, host_ip: "127.0.0.1"

  # Create a private network, which allows host-only access to the machine
  # using a specific IP.
  # config.vm.network "private_network", ip: "192.168.33.10"

  # Create a public network, which generally matched to bridged network.
  # Bridged networks make the machine appear as another physical device on
  # your network.
  # config.vm.network "public_network"

  # Share an additional folder to the guest VM. The first argument is
  # the path on the host to the actual folder. The second argument is
  # the path on the guest to mount the folder. And the optional third
  # argument is a set of non-required options.
  # config.vm.synced_folder "../data", "/vagrant_data"

  # Provider-specific configuration so you can fine-tune various
  # backing providers for Vagrant. These expose provider-specific options.
  # Example for VirtualBox:
  #
  # config.vm.provider "virtualbox" do |vb|
  #   # Display the VirtualBox GUI when booting the machine
  #   vb.gui = true
  #
  #   # Customize the amount of memory on the VM:
  #   vb.memory = "1024"
  # end
  #虚拟机名字heaton-centos7,内存,核数
    config.vm.provider "virtualbox" do |vb|
      vb.memory = "4096"
      vb.name= "heaton-centos7"
      vb.cpus= 2
    end
  #
  # View the documentation for the provider you are using for more
  # information on available options.

  # Enable provisioning with a shell script. Additional provisioners such as
  # Puppet, Chef, Ansible, Salt, and Docker are also available. Please see the
  # documentation for more information about their specific syntax and use.
  # config.vm.provision "shell", inline: <<-SHELL
  #   apt-get update
  #   apt-get install -y apache2
  # SHELL
end
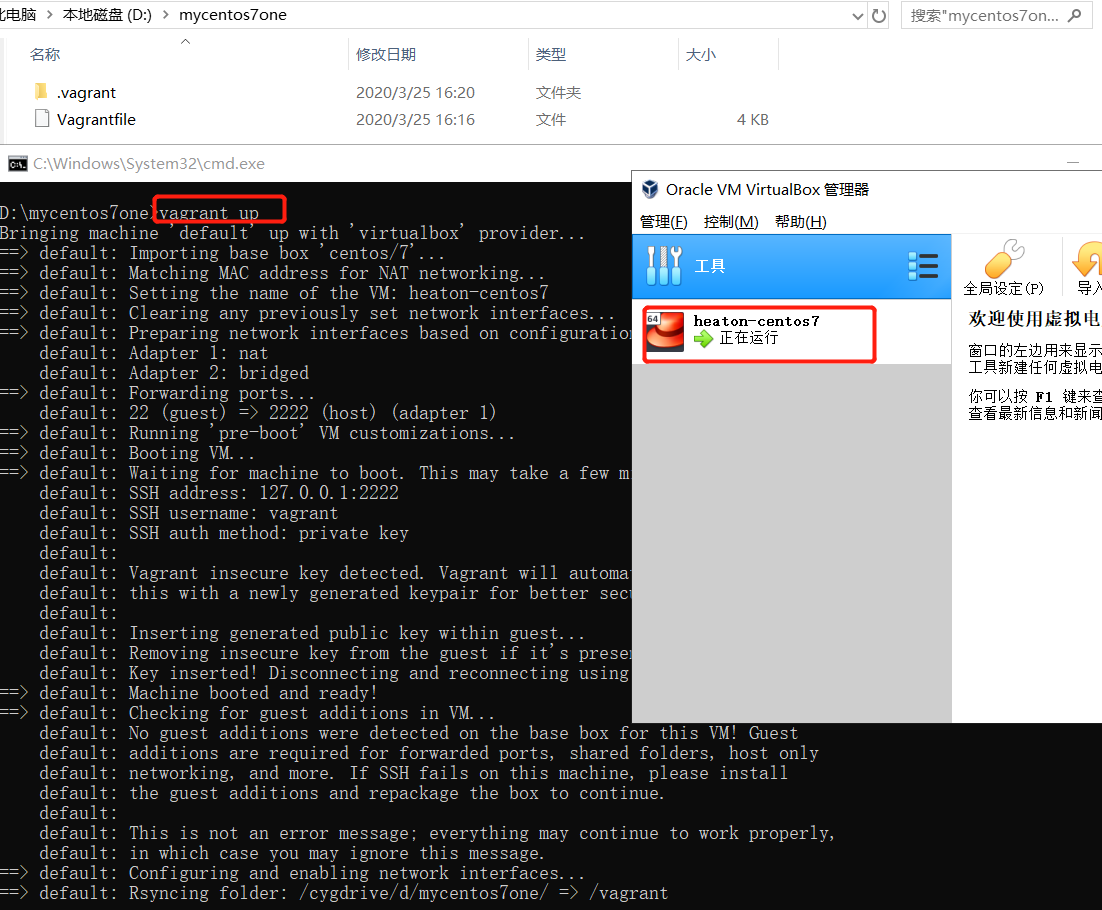
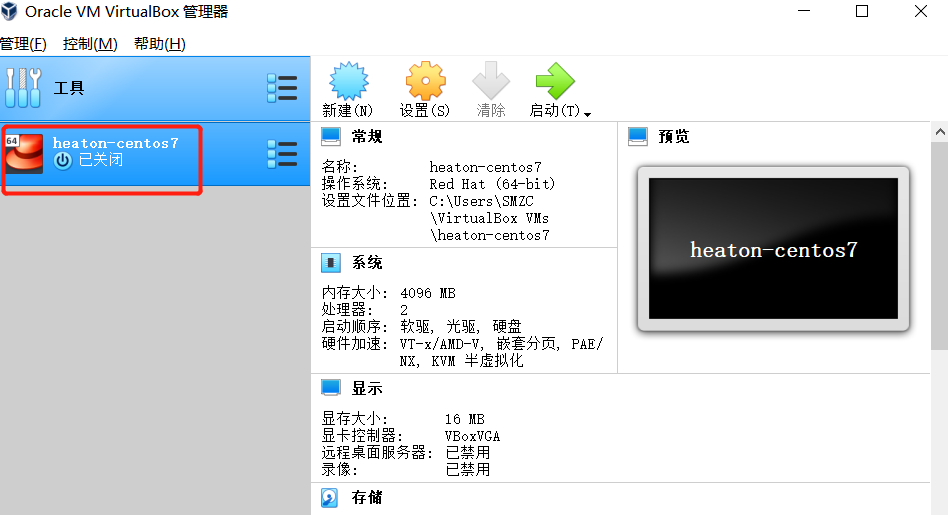
1、 在Vagrantfile文件命令行目录,使用命令vagrant up创建启动虚拟机
4.3 修改root密码
1、 使用vagrant ssh 命令进入刚刚创建的虚拟机
2、 使用sudo -i命令进入root用户
3、 使用vi /etc/ssh/sshd_config命令修改sshd_config使root用户可以使用密码登录
PasswordAuthentication yes

1、 使用passwd设置密码

1、 使用systemctl restart sshd重启密码服务
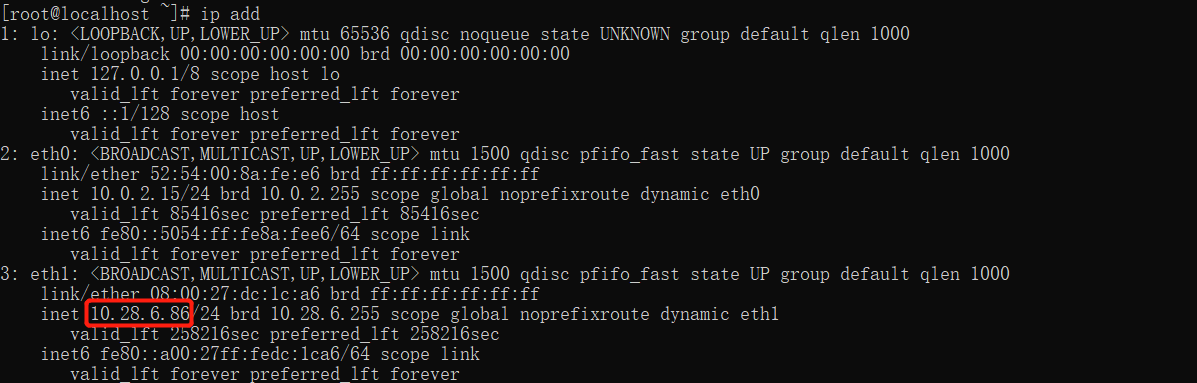
2、 使用ip add查看ip即可使用远程工具登录root用户

5 复制虚拟机
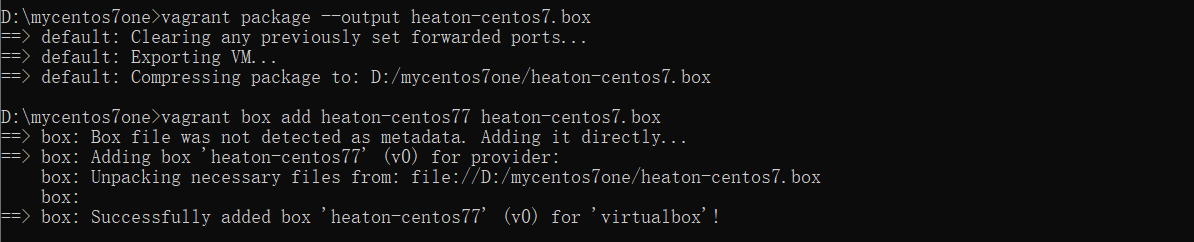
1、 关闭需要复制的虚拟机
1、 进入虚拟机所在目录
vagrant package --output heaton-centos7.box
1、 将上面得到的heaton-centos7.box文件添加进vagrant镜像中
vagrant box add heaton-centos77 heaton-centos7.box
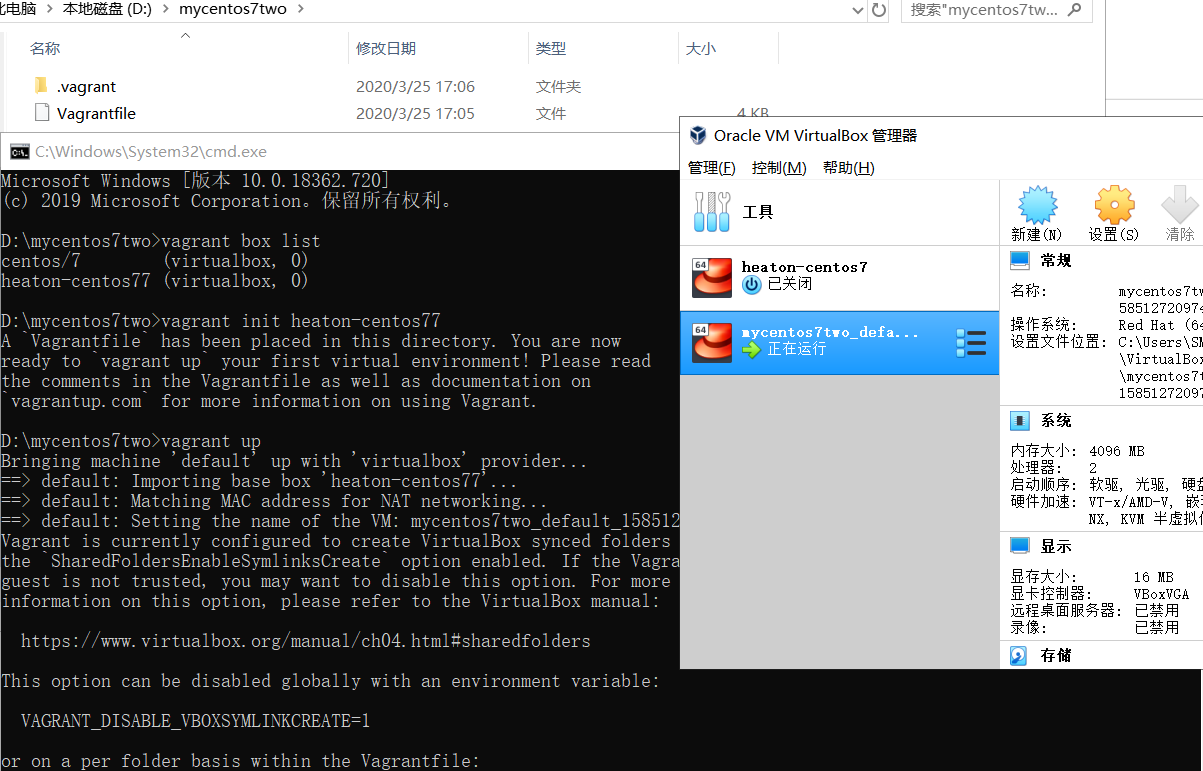
1、 进入一个新目录,生成新的虚拟机Vagrantfile
vagrant init heaton-centos77
1、 启动,则得到一个一模一样的虚拟机(注意修改网络)
vagrant up
6 一次性创建多台centos7
6.1 添加本地centos/7镜像
找到下载好的virtualbox.box文件目录
使用
vagrant box add centos/7 C:\Users\SMZC\Desktop\virtualbox\virtualbox.box添加vagrant镜像使用
vagrant box list查询镜像
6.2 创建虚拟机环境
1、 新建一个文件夹,并进入命令行cmd

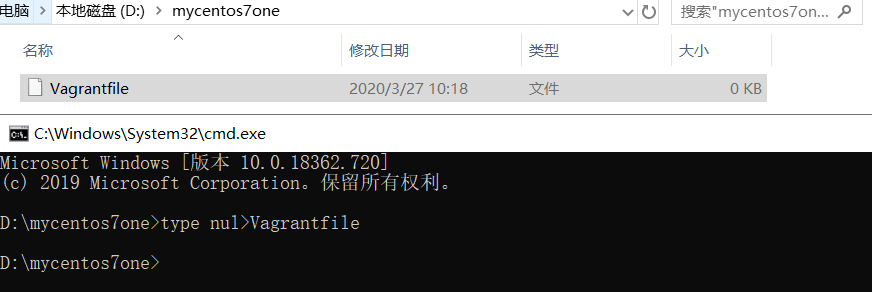
1、 使用type nul>Vagrantfile命令创建Vagrantfile文件
1、 修改Vagrantfile文件
- 先查询本机ip记住前三段,需要在Vagrantfile中指定
- 以下是创建3台的Vagrantfile
boxes = [
    {
        :name => "master",
        :eth1 => "192.168.192.10",
        :mem => "2048",
        :cpu => "2",
        :sshport => 22230
    },
    {
        :name => "slave1",
        :eth1 => "192.168.192.11",
        :mem => "2048",
        :cpu => "2",
        :sshport => 22231
    },
    {
        :name => "slave2",
        :eth1 => "192.168.192.12",
        :mem => "2048",
        :cpu => "2",
        :sshport => 22232
    }
]
Vagrant.configure(2) do |config|
    config.vm.box = "centos/7"
    boxes.each do |opts|
        config.vm.define opts[:name] do |config|
            config.vm.hostname = opts[:name]
            config.vm.network :public_network, ip: opts[:eth1]
            config.vm.network "forwarded_port", guest: 22, host: 2222, id: "ssh", disabled: "true"
        config.vm.network "forwarded_port", guest: 22, host: opts[:sshport]
            config.vm.provider "vmware_fusion" do |v|
                v.vmx["memsize"] = opts[:mem]
                v.vmx["numvcpus"] = opts[:cpu]
            end
            config.vm.provider "virtualbox" do |v|
                v.customize ["modifyvm", :id, "--memory", opts[:mem]]
            v.customize ["modifyvm", :id, "--cpus", opts[:cpu]]
                v.customize ["modifyvm", :id, "--name", opts[:name]]
            end
        end
    end
end
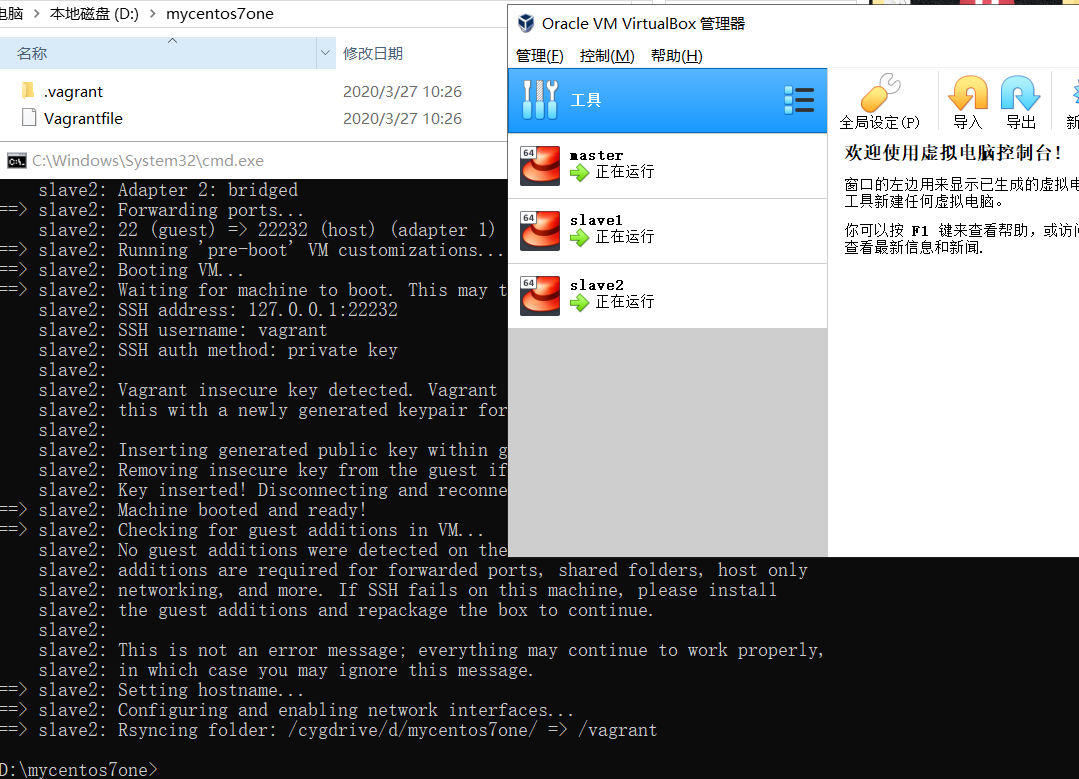
1、 在Vagrantfile文件命令行目录,使用命令vagrant up创建启动虚拟机
6.3 修改root密码
1、 使用命令进入刚刚创建的虚拟机,如下为上面创建的3台虚拟机,可以选择多开cmd,或者依次处理。
 *  `vagrant ssh master`
 *  `vagrant ssh slave1`
 *  `vagrant ssh slave2`
2、 使用sudo -i命令进入root用户
3、 使用vi /etc/ssh/sshd_config命令修改sshd_config文件,使root用户可以使用密码登录
PasswordAuthentication yes

1、 使用passwd设置密码

1、 使用systemctl restart sshd重启密码服务
2、 即可使用远程工具登录Vagrantfile上指定ip的root用户。