- 地址:Building CRUD APIs using Deno and oak
- 作者:Kailas Walldoddi
- 译文出自:掘金翻译计划
- 本文永久链接:github.com/xitu/gold-m…
- 译者:lhd951220
- 校对者:MangoTsing
相对于 Node 来说,Deno 是相当新的环境。开发者在学习 Deno 的时候通常想做的第一件事就是构建 CRUD API。Deno 有一系列的项目帮助我们实现这个目的,包括 deno-express、oak、servest、deno-drash 和 pogo。在这篇文章,我们将会使用 Deno 和 Oak 学习构建一个待办事项清单。
我们要构建什么?
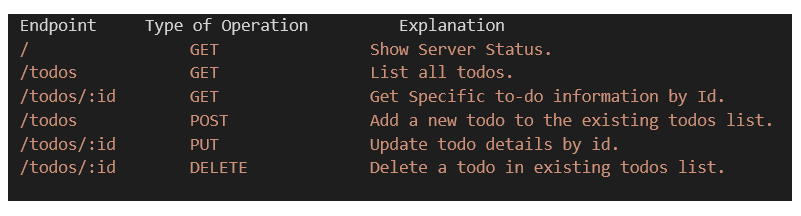
Oak 是一个受到 Koa 启发的项目,Koa 是一个很受欢迎并提供 HTTP 服务的 Node.js 中间件框架。我们将会使用 oak 和 Deno 构建一个处理待办实现清单的小应用。我们将要创建的 API 如下面的 Endpoint 显示。
我们如何构建它?
我们需要在我们的项目库中创建两个文件,分别是 app.ts 和 routes.ts。一个用于应用,另一个则是用于服务的路由。
app.ts 文件的内容如下面的文件显示。看看我们是如何在 app.ts 文件中从 oak 引入 Application 模块的。我们在第 8 行创建了新的 oak 应用。我们让这个应用使用了稍后将会在 routes.ts 文件中定义的路由。现在,这个应用将可以运行在第 6 行指定的地址和第 5 行指定的端口上。
import { Application } from 'https://deno.land/x/oak/mod.ts';
import { router } from "./routes.ts";

const env = Deno.env.toObject()
const PORT = env.PORT || 4000
const HOST = env.HOST || '127.0.0.1'

const app = new Application()

app.use(router.routes())
app.use(router.allowedMethods())

console.log(`Listening on port ${PORT}...`)

await app.listen(`${HOST}:${PORT}`)
我们将会在 routes.ts 中创建一个 Todo 接口,该接口包含两个字段 id 和 description。我们将会使待办事项的 id 和待办事项的描述分别存储在这两个字段上。我们还有一个待办事项清单,其中包含首次返回时使用的初始清单。
interface Todo {
    description: string
    id: number
}

let todos: Array<Todo> = [
    {
        description: 'Todo 1',
        id: 1,
    },
    {
        description: 'Todo 2',
        id: 2,
    },
]
我们现在来定义一些支持待办事项的列表操作的相关函数,通过 id 获取指定的待办事项,创建新的待办事项,通过 id 更新/删除指定待办事项的描述。可以从下面的文件中看到类似的代码。
export const getTodos = ({ response }: { response: any }) => {
response.body = todos
}
export const getTodo = ({
params,
response,
}: {
params: {
id: string
}
response: any
}) => {
const todo = todos.filter((todo) => todo.id === parseInt(params.id))
if (todo.length) {
response.status = 200
response.body = todo[0]
return
}
response.status = 400
response.body = { msg: `Cannot find todo ${params.id}` }
}
export const addTodo = async ({
request,
response,
}: {
request: any
response: any
}) => {
const body = await request.body()
const { description, id }: { description: string; id: number } = body.value
todos.push({
description: description,
id: id,
})
response.body = { msg: 'OK' }
response.status = 200
}
export const updateTodo = async ({
params,
request,
response,
}: {
params: {
id: string
}
request: any
response: any
}) => {
const temp = todos.filter((existingTodo) => existingTodo.id === parseInt(params.id))
const body = await request.body()
const { description }: { description: string } = body.value.description
if (temp.length) {
temp[0].description = description
response.status = 200
response.body = { msg: 'OK' }
return
}
response.status = 400
response.body = { msg: `Cannot find todo ${params.id}` }
}
export const removeTodo = ({
params,
response,
}: {
params: {
id: string
}
response: any
}) => {
const lengthBefore = todos.length
todos = todos.filter((todo) => todo.id !== parseInt(params.id))
if (todos.length === lengthBefore) {
response.status = 400
response.body = { msg: `Cannot find todo ${params.id}` }
return
}
response.body = { msg: 'OK' }
response.status = 200
}
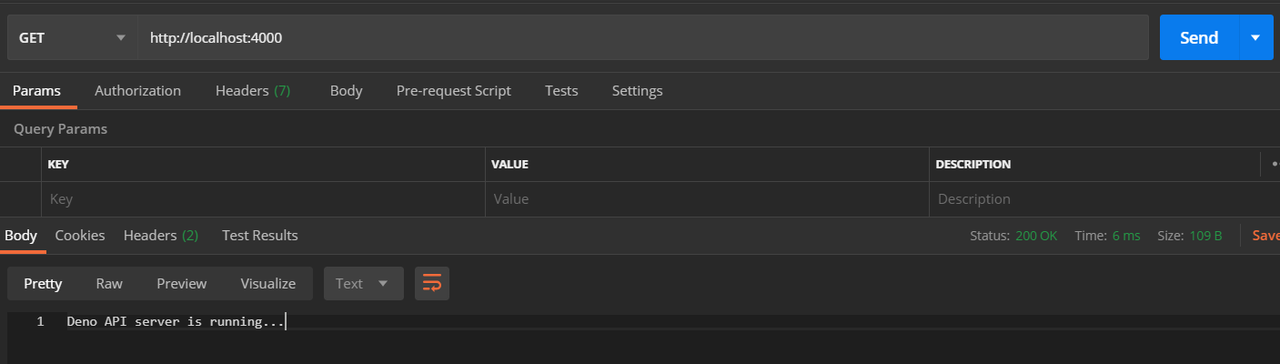
export const getHome = ({ response }: { response: any }) => {
response.body = 'Deno API server is running...'
response.status = 200
}
我们通过下面的函数创建并导出了路由。
import { Router } from 'https://deno.land/x/oak/mod.ts'

export const router = new Router()
router
    .get('/', getHome)
    .get('/todos', getTodos)
    .get('/todos/:id', getTodo)
    .post('/todos', addTodo)
    .put('/todos/:id', updateTodo)
    .delete('/todos/:id', removeTodo)
运行以下命令即可让应用运行在 http://localhost:4000 上
deno run — allow-env — allow-net app.ts
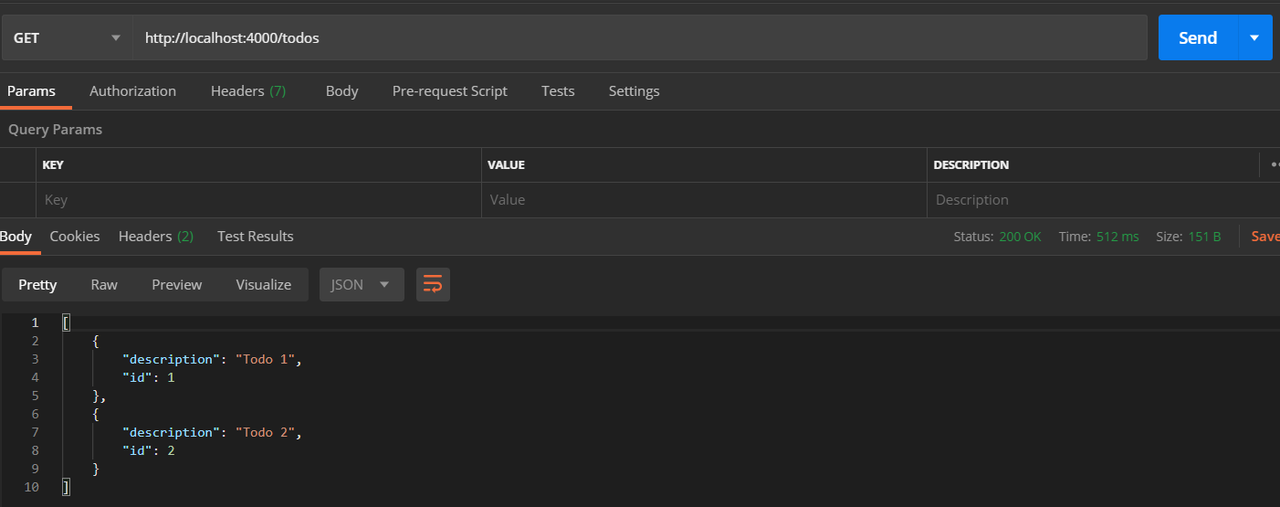
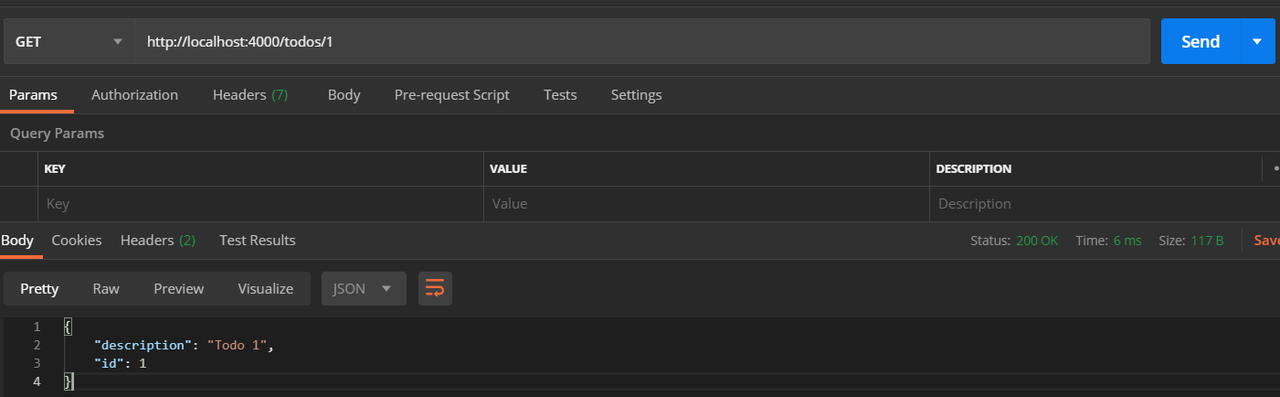
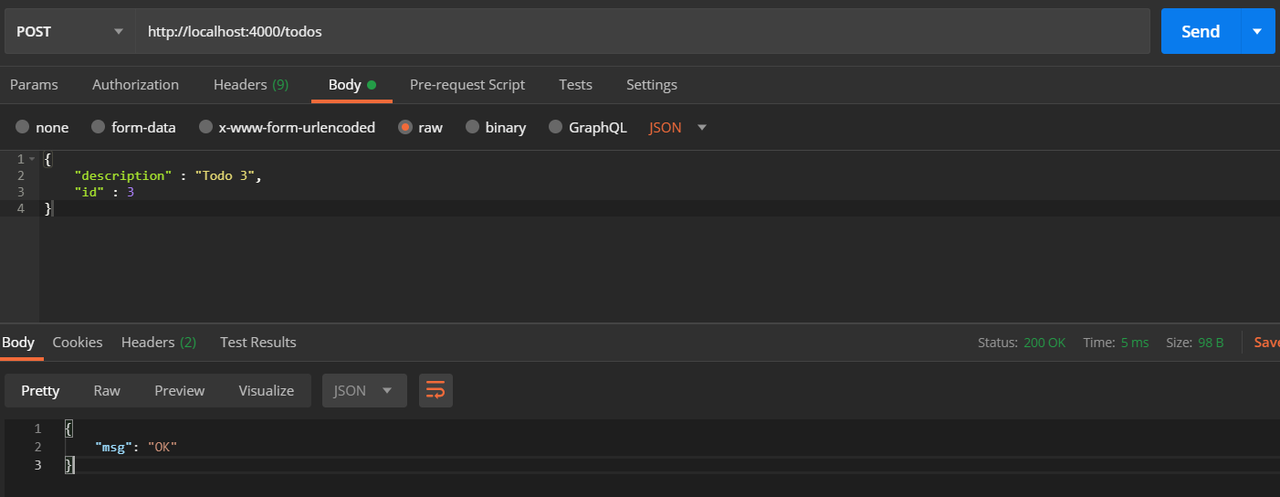
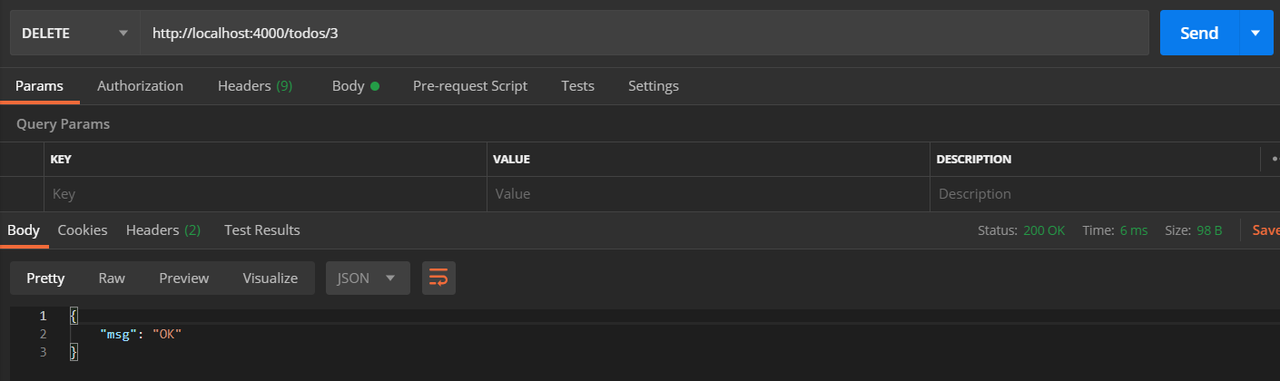
现在,应用运行在 localhost:4000 上,使用 postman 或者其他类似的工具来测试这些 API 路由接口。以下是使用 postman 测试得到的结果的屏幕截图。
如果你想克隆我在文章中使用的代码,以此观察它是如何工作的。你可以使用下面的链接在 GitHub 上查看。
源码链接 : https://github.com/Kailashw/deno-api-oak
如果发现译文存在错误或其他需要改进的地方,欢迎到 掘金翻译计划 对译文进行修改并 PR,也可获得相应奖励积分。文章开头的 本文永久链接 即为本文在 GitHub 上的 MarkDown 链接。
掘金翻译计划 是一个翻译优质互联网技术文章的社区,文章来源为 掘金 上的英文分享文章。内容覆盖 Android、iOS、前端、后端、区块链、产品、设计、人工智能等领域,想要查看更多优质译文请持续关注 掘金翻译计划、官方微博、知乎专栏。