1 在Docker环境下的安装
1.1 下载nginx的docker镜像
docker pull nginx
1.2 拷贝容器nginx默认配置
- 先运行一次容器(为了拷贝配置文件):
docker run -p 80:80 --name nginx -v /usr/local/docker/nginx/html:/usr/share/nginx/html -v /usr/local/docker/nginx/logs:/var/log/nginx -d nginx:latest
- 将容器内的配置文件拷贝到指定目录
docker container cp nginx:/etc/nginx /usr/local/docker/nginx/
cd /usr/local/docker/nginx
mv nginx conf
- 终止并删除容器
docker stop nginx
docker rm nginx
- 进入nginx配置目录
cd /usr/local/docker/nginx/conf/conf.d/
ls
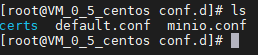
- 我这边以Minio对象存储为例子,新建minio.conf,配置如下
server {
    listen 443 ssl;
    server_name www.example.top; #你的申请过证书的域名
    client_max_body_size 64M;
    fastcgi_read_timeout 3600;
    error_page   500 502 503 504  /50x.html;
    root   /usr/share/nginx/html;
    try_files $uri $uri/ @rewrite;
    # ssl on;
    ssl_certificate     /etc/nginx/conf.d/certs/www.example.top/example.pem;
    ssl_certificate_key /etc/nginx/conf.d/certs/www.example.top/example.key;
    ssl_session_timeout 5m;
    ssl_protocols TLSv1 TLSv1.1 TLSv1.2; #按照这个协议配置
    ssl_ciphers ECDHE-RSA-AES128-GCM-SHA256:HIGH:!aNULL:!MD5:!RC4:!DHE;#按照这个套件配置
    ssl_prefer_server_ciphers on;

    location / {
        add_header Content-Security-Policy upgrade-insecure-requests;
        proxy_set_header HOST $host;
        proxy_set_header X-Forwarded-Proto $scheme;
        proxy_set_header X-Real-IP $remote_addr;
        proxy_set_header X-Forwarded-For $proxy_add_x_forwarded_for;
        proxy_pass http://172.17.0.5:9001/;
    }
}
- 证书需要自己生成或者购买第三方证书,下载下来放入/usr/local/docker/nginx/conf/conf.d/certs目录当中
- 同时我们修改默认配置default.conf,使用http自动转https
server {
    listen       80;
    server_name  www.sparksys.top;

    #charset koi8-r;
    #access_log  /var/log/nginx/host.access.log  main;
    rewrite ^(.*)$ https://$host$1 permanent;
    add_header Content-Security-Policy upgrade-insecure-requests;
    location / {
        root   /usr/share/nginx/html;
        index  index.html index.htm;
    }

    #error_page  404              /404.html;

    # redirect server error pages to the static page /50x.html
    #
    error_page   500 502 503 504  /50x.html;
    location = /50x.html {
        root   /usr/share/nginx/html;
    }

    # proxy the PHP scripts to Apache listening on 127.0.0.1:80
    #
    #location ~ \.php$ {
    #    proxy_pass   http://127.0.0.1;
    #}

    # pass the PHP scripts to FastCGI server listening on 127.0.0.1:9000
    #
    #location ~ \.php$ {
    #    root           html;
    #    fastcgi_pass   127.0.0.1:9000;
    #    fastcgi_index  index.php;
    #    fastcgi_param  SCRIPT_FILENAME  /scripts$fastcgi_script_name;
    #    include        fastcgi_params;
    #}

    # deny access to .htaccess files, if Apache's document root
    # concurs with nginx's one
    #
    #location ~ /\.ht {
    #    deny  all;
    #}
}
重点在 rewrite ^(.*) host$1 permanent;,实现https的自动转换
1.3 使用docker-compose部署启动
- 创建docker-compose.yaml文件,配置如下:
version: '3.1'
services:
  nginx:
    image: nginx:latest
    container_name: nginx
    restart: always
    ports:
      - 80:80
      - 443:443
    volumes:
      - /usr/local/docker/nginx/conf:/etc/nginx
      - /usr/local/docker/nginx/logs:/var/log/nginx
      - /usr/local/docker/nginx/html:/usr/share/nginx/html
我们需要暴露80和443端口,在这之前防火墙关闭或者开放80和443端口
- 部署nginx
docker-compose up -d
- 此时查看docker运行的容器
docker ps -a

- 在浏览器输入域名网址

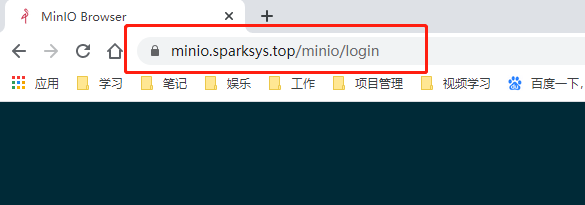
到此docker&docker-compose部署nginx成功