在日常工作中,往往有一些项目我们不方便托管在GitHub,npm这上面,一个私有的包管理平台就显得尤为重要!直入主题,开始今天的主角 sinopia。
1、安装sinopia
npm install -g sinopia
2、配置 sinopia
我是在阿里云服务器(ubantu)上搭建的,接下来的步骤都是在阿里云上进行操作。
/root/.config/sinopia/config.yaml
打开如上文件,修改成下面这样:
#
# This is the default config file. It allows all users to do anything,
# so don't use it on production systems.
#
# Look here for more config file examples:
# https://github.com/rlidwka/sinopia/tree/master/conf
#

# path to a directory with all packages
storage: ./storage

auth:
  htpasswd:
    file: ./htpasswd
    # Maximum amount of users allowed to register, defaults to "+inf".
    # You can set this to -1 to disable registration.
    max_users: 1000

# a list of other known repositories we can talk to
uplinks:
  npmjs:
    url: https://registry.npm.taobao.org

packages:
  '@*/*':
    # scoped packages
    access: $all
    publish: $authenticated

  '*':
    # allow all users (including non-authenticated users) to read and
    # publish all packages
    #
    # you can specify usernames/groupnames (depending on your auth plugin)
    # and three keywords: "$all", "$anonymous", "$authenticated"
    access: $all

    # allow all known users to publish packages
    # (anyone can register by default, remember?)
    publish: $authenticated

    # if package is not available locally, proxy requests to 'npmjs' registry
    proxy: npmjs

# log settings
logs:
  - {type: stdout, format: pretty, level: http}
  #- {type: file, path: sinopia.log, level: info}

# add
max_body_size: '200mb'
listen: 0.0.0.0:4873
3、安装pm2
npm install -g pm2
4、运行 sinopia
可以直接运行
sinopia
但是并不想一关掉cmd,进程就被注销。
pm2 start sinopia
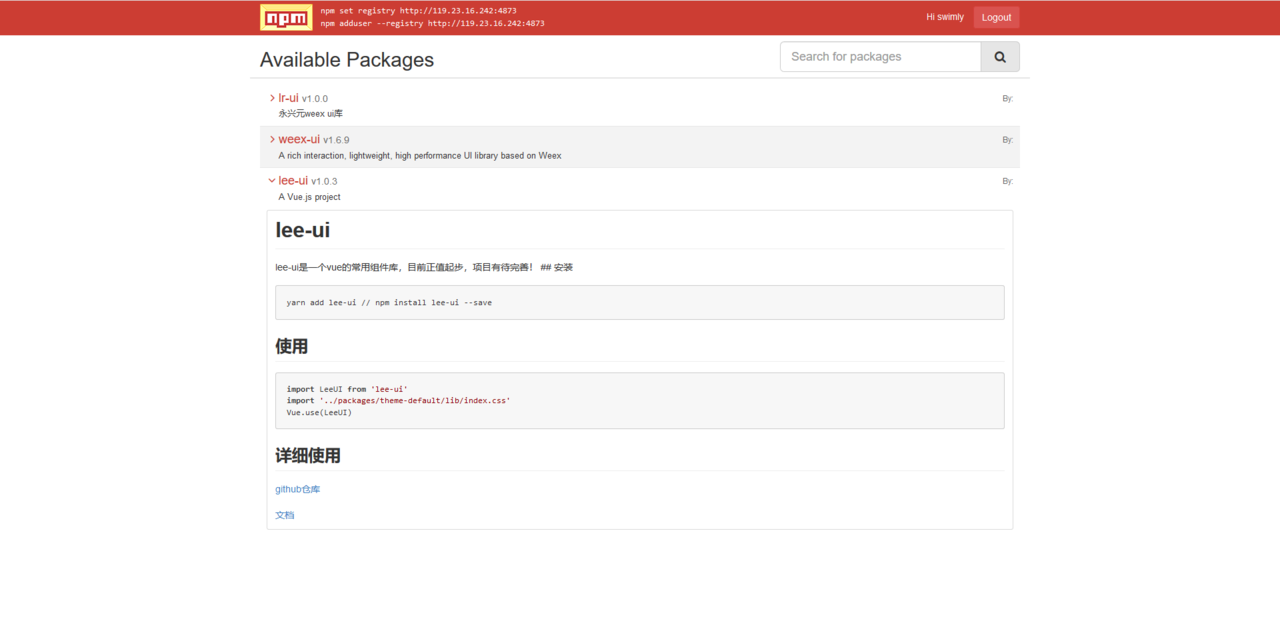
这时候打开 ip::4873 会看到如下:
5、修改 sinopia权限 进入到目录:(/root/.config/sinopia/storage)
chmod 777 .sinopia-db.json
到这里,服务端的配置就已经全部完成。接下来是在本地要怎么以及安装。
6、安装nrm (npm源管理)
npm install -g nrm
7、添加sinopia源
nrm add sinopia http://127.0.0.1:4873
查看现有的npm源
nrm ls
8、切换到 sinopia
nrm use sinopia
9、包 在包之前还需要先注册并且登录一个用户
(1) 注册用户
npm adduser
接下来会提示你输入 username, password, email,根据自身情况输入即可!
(2) 登录用户
npm login
也是根据提示依次输入刚才注册的信息。
10、 进入到项目根目录
npm publish
11、安装
npm install --save XXX