 搜云库技术团队
一 代码扫描
1.1 sonarqube规范
由于项目较多,sonarqube的token在用户下定义,这样多项目就可以公用这一个token
1.2 变量
- SONAR_TOKEN:sonarqube token,在sonarqube 服务器创建在用户下,所有项目统一用此token,该变量设置在gitlab 服务端环境变量中。* * * *
- SONAR_HOST:sonarqube 服务器地址,在该变量设置在gitlab 服务端环境变量中。
- PROJECT_NAME:项目名称,放在全局变量中
1.3 CI文件
.scan:
  script:
    - echo -e "\033[5;35;40m code scan \033[0m"
    - sonar-scanner -Dsonar.projectKey=${PROJECT_NAME} -Dsonar.sources=. -Dsonar.host.url=${SONAR_HOST} -Dsonar.login=${SONAR_TOKEN}
  retry:
    max: 2
    when:
      - always
  #parallel: 2
  allow_failure: true
二 单元测试
将单元测试集成在CI的test stage中,然后将deploy pages集成在deploy步骤中。
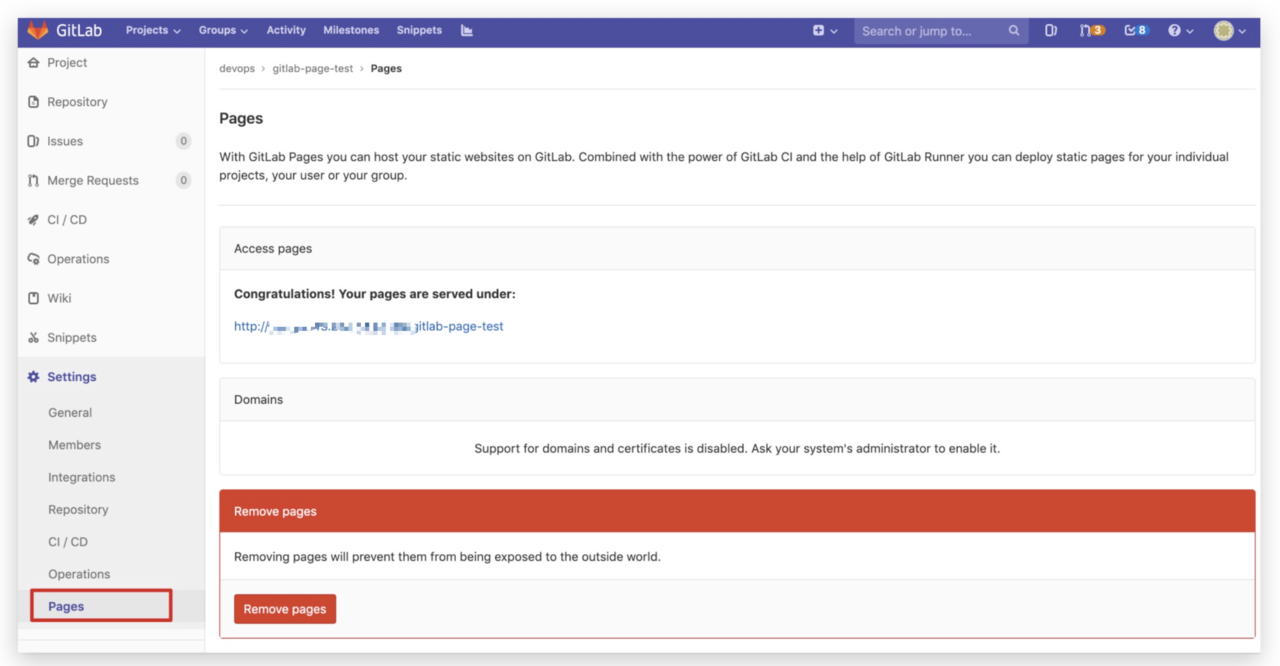
2.1 Gitlab Pages开启
开启gitlab pages需要在gitlab服务端配置进行开启,需要配合gitlab CI来完成,需要注意,名字必须为pages,stage必须为deploy。Gitlab pages会一直去在开启了gitlab pages,这个存储库的public目录找静态文件现实在gitlab pages中,注意:这个public是指存储库的public,与项目结构无关。换言之,这个public目录不可见。
- 启用gitlab pages
编辑/etc/gitlab/gitlab.rb,启用gitlab page
gitlab_pages['access_control'] = true
pages_external_url "http://xx.xx.xx.xx"
gitlab_pages['enable'] = true
执行gitlab-ctl reconfigure生效启用pages,
- 使用IP加端口方式访问
但是如果你不想那么麻烦还得配置域名的话,这里也有解决方法,由于GitLab Pages服务是部署到Nginx中,我们可以同配置Nginx来通过IP地址访问。
首先要找啊找,找到Pages的发布位置,和GitLab内置Nginx的位置,分别如下:
1、Pages部署目录:/var/opt/gitlab/gitlab-rails/shared/pages
2、内置Nginx目录:/var/opt/gitlab/nginx
使用IP加端口方式访问,需要配置gitlab nginx,编辑配置文件/var/opt/gitlab/nginx/conf/gitlab-pages.conf
server {
  listen *:80;
  server_name  ~^(?<group>.*)$;
  server_tokens off; ## Don't show the nginx version number, a security best practice

  ## Disable symlink traversal
  disable_symlinks on;
  access_log  /var/log/gitlab/nginx/gitlab_pages_access.log gitlab_access;
  error_log   /var/log/gitlab/nginx/gitlab_pages_error.log;

  # Pass everything to pages daemon
  location / {
    proxy_set_header Host $http_host;
    proxy_set_header X-Real-IP $remote_addr;
    proxy_set_header X-Forwarded-For $proxy_add_x_forwarded_for;
    proxy_set_header X-Forwarded-Proto http;
    proxy_cache off;
    root /var/opt/gitlab/gitlab-rails/shared/pages/devops;
    #proxy_pass          http://localhost:8090;
  }
  error_page 403 /403.html;
  error_page 404 /404.html;
}
使用restart来重新生效gitlab-ctl restart nginx。
2.2 执行单元测试
执行单元测试生产html报告,生成页面文件在coverage目录中。
test-dev:
  image: python:3.6
  variables:
    RUN_PY: runtests.py
    PROJECT_NAME: smartant_api_linux
    PROJECT_GROUP: devops
  tags:
    - devops-dev-runner
  stage: test-scan
  script:
    - echo -e "\033[5;35;40m code scan \033[0m"
    - cd /builds/${PROJECT_GROUP}/${PROJECT_NAME}
    - pip install --default-timeout=500 -r requirements/requirements.txt -i http://mirrors.aliyun.com/pypi/simple/ --trusted-host mirrors.aliyun.com            # 安装环境依赖
    - cd test && coverage run --include=../application.py,../logs.py,../libs/*.py,../views/*.py  --omit="test_*.py" ${RUN_PY} && echo 0 || echo 0               # 执行单元测试
    - coverage report -m
    - coverage html -d ../coverage  # 生产报告
    - ls -l
    - pwd
  artifacts:
    paths:
      - coverage                # 将报告存储在制品中
  only:
    - dev
  retry:
    max: 2
    when:
      - always
  allow_failure: true
2.3 部署pages
上一步已经完成了单元测试并根据单元测试完成覆盖html文件生成,在此部署将pages进行部署,注意:名字必须为pages,且stage为deploy,其中该步骤依赖于生成静态文件的stage,并将制品在该步骤中进行传递,重命名为public,由于之前已经配置了nginx,此刻,利用IP端口就能访问到public下面的文件。
pages:
  variables:
    PROJECT_NAME: smartant_api_linux
  tags:
    - devops-dev-runner
  stage: deploy
  dependencies:
    - test-dev
  script:
    - echo -e "\033[5;35;40m deploy gitlab page \033[0m"
    - mv coverage/ public/
  artifacts:
    expire_in: 3 days
    paths:
      - public/
  only:
    - dev
访问:通过项目名称+ public进行访问。


