搜云库技术团队
今天我们学习如何利用Ant调用Jmeter脚本,并将生成的 jtl 文件转换为 HTML 格式的测试报告。
准备工作
需要在Linux上提前安装好 JDK、 Jmeter 和 Ant。
1,JDK(可参考文章:Linux下安装JDK 1.8)
2,Jmeter(可参考文章:Linux下安装Jmeter)
3,Ant(可参考文章:Linux下安装Ant)
在Linux上新建以下目录(根据自己实际情况处理):
[root@wintest ~]# mkdir /root/demo
[root@wintest ~]# mkdir /root/demo/jmeter_script
[root@wintest ~]# mkdir /root/demo/result
[root@wintest ~]# mkdir /root/demo/result/html
[root@wintest ~]# mkdir /root/demo/result/jtl
[root@wintest ~]# cd /root/demo
[root@wintest demo]#
其中,
jmeter_script用于存放Jmeter的测试脚本(jmx文件),result用于存放测试结果,其子文件夹html和jtl分别用于存放生成的HTML测试报告和jtl文件。
准备一个 Jmeter 的测试脚本,并放到jmeter_script 下。此时,如果直接在 /root/demo 目录下执行 ant 命令,会出现报错提示 build.xml 不存在:
[root@wintest demo]# ant
Buildfile: build.xml does not exist!
Build failed
[root@wintest demo]#
build.xml 是 ant 的构建文件,可以自己编写一个,或者去网上找一个下来自己进行修改,以下是我这里的 build.xml 内容:
<?xml version="1.0" encoding="utf8"?>
<project name="ant-jmeter-test" default="run" basedir=".">
<tstamp>
<format property="time" pattern="yyyyMMddHHmm" />
</tstamp>
<!-- 需要改成自己本地的jmeter目录-->
<property name="jmeter.home" value="/root/SoftWare/Jmeter/apache-jmeter-5.1.1" />
<!-- jmeter生成的jtl格式的结果报告的路径-->
<property name="jmeter.result.jtl.dir" value="/root/demo/result/jtl" />
<!-- jmeter生成的html格式的结果报告的路径-->
<property name="jmeter.result.html.dir" value="/root/demo/result/html" />
<!-- ʺ生成的报告的前缀-->
<property name="ReportName" value="TestReport" />
<property name="jmeter.result.jtlName" value="${jmeter.result.jtl.dir}/${ReportName}.jtl" />
<property name="jmeter.result.htmlName" value="${jmeter.result.html.dir}/${ReportName}.html" />
<target name="run">
<antcall target="test" />
<antcall target="report" />
</target>
<target name="test">
<taskdef name="jmeter" classname="org.programmerplanet.ant.taskdefs.jmeter.JMeterTask" />
<jmeter jmeterhome="${jmeter.home}" resultlog="${jmeter.result.jtlName}" jmeterlogfile="/root/demo/jmeter.log">
<!-- 声明要运行的脚本"*.jmx"指包含此目录下的所有jmeter脚本-->
<testplans dir="/root/demo/jmeter_script" includes="*.jmx" />
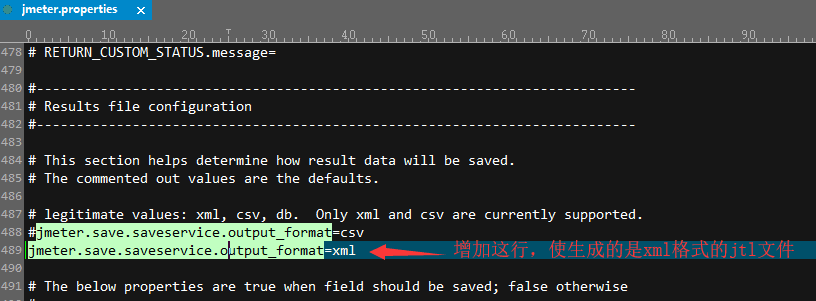
<property name="jmeter.save.saveservice.output_format" value="xml"/>
</jmeter>
</target>
<path id="xslt.classpath">
<fileset dir="${jmeter.home}/lib" includes="xalan*.jar"/>
<fileset dir="${jmeter.home}/lib" includes="serializer*.jar"/>
</path>
<target name="report">
<tstamp>
<format property="report.datestamp" pattern="yyyy/MM/dd HH:mm" />
</tstamp>
<xslt
classpathref="xslt.classpath"
force="true"
in="${jmeter.result.jtlName}"
out="${jmeter.result.htmlName}"
style="${jmeter.home}/extras/jmeter.results.shanhe.me.xsl">
<param name="dateReport" expression="${report.datestamp}"/>
</xslt>
<!-- 拷贝报告所需的图片资源至目标目录 -->
<copy todir="${jmeter.result.html.dir}">
<fileset dir="${jmeter.home}/extras">
<include name="collapse.png" />
<include name="expand.png" />
</fileset>
</copy>
</target>
</project>
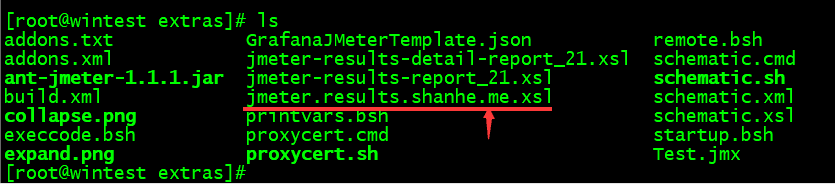
上面使用了一个网上的Jmeter报告模板文件:jmeter.results.shanhe.me.xsl,需要下载该文件并放到Jmeter所在目录下 extras 子目录中。
最终,我们的demo结构如下:
[root@wintest demo]# ls
build.xml  jmeter_script  result
[root@wintest demo]# tree
.
├── build.xml
├── jmeter_script
│   └── ant_jmeter_test.jmx
└── result
    ├── html
    └── jtl

4 directories, 2 files
[root@wintest demo]#
另外,我们还需要将安装Jmeter所在目录下 extras 子目录(/root/SoftWare/Jmeter/apache-jmeter-5.1.1/extras)的 ant-jmeter-1.1.1.jar 复制到ant所在目录下 lib 子目录(/root/SoftWare/Ant/apache-ant-1.9.14/lib)下,这样ant在执行时才能正常触发Jmeter的jmx脚本文件,命令如下:cp /root/SoftWare/Jmeter/apache-jmeter-5.1.1/extras/ant-jmeter-1.1.1.jar /root/SoftWare/Ant/apache-ant-1.9.14/lib
修改Jmeter配置文件
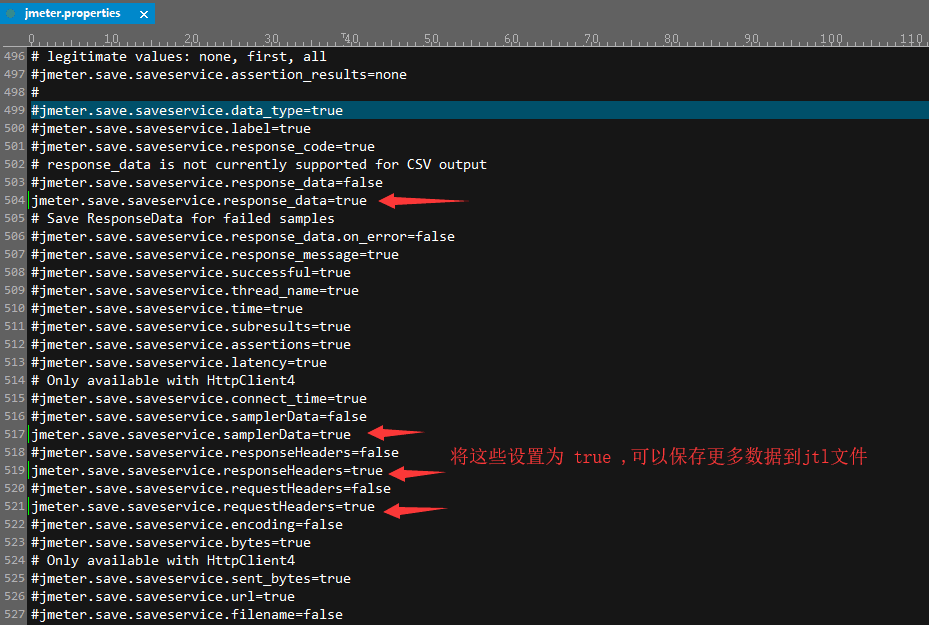
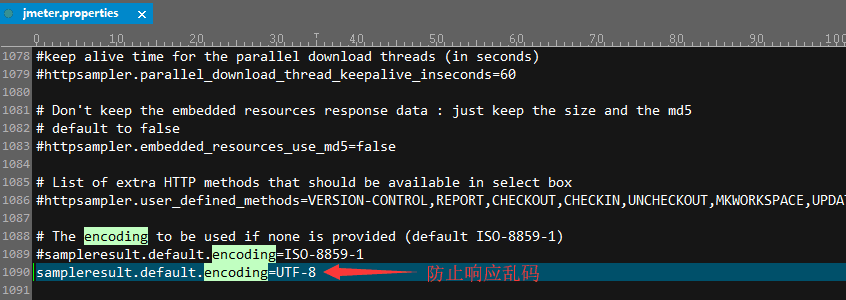
接着,我们还需要修改下Jmeter所在目录下 bin 子目录(/root/SoftWare/Jmeter/apache-jmeter-5.1.1/bin)下的 jmeter.properties,修改如下:
将一些参数设置为 true,可以保存这些结果到 jtl 文件,如果有需要也可以全部设置为 true 来试试。
为了防止出现响应乱码,最好将这里编码设置为 UTF-8。
Ant构建生成测试报告
以上配置完成后,现在我们只需要执行Ant构建,便可以得到测试结果了。因为在安装Ant时已经配置了环境变量,所以只需要在项目下输入 ant,就可以得到jtl文件及转换后的HTML测试报告。
[root@wintest demo]# ant
Buildfile: /root/demo/build.xml

run:

test:
   [jmeter] Executing test plan: /root/demo/jmeter_script/ant_jmeter_test.jmx ==> /root/demo/result/jtl/TestReport.jtl
   [jmeter] Creating summariser <summary>
   [jmeter] Created the tree successfully using /root/demo/jmeter_script/ant_jmeter_test.jmx
   [jmeter] Starting the test @ Mon Jan 20 23:02:29 CST 2020 (1579532549840)
   [jmeter] Waiting for possible Shutdown/StopTestNow/HeapDump/ThreadDump message on port 4445
   [jmeter] summary +      1 in 00:00:00 =    2.6/s Avg:   100 Min:   100 Max:   100 Err:     0 (0.00%) Active: 1 Started: 1 Finished: 0
   [jmeter] summary =      1 in 00:00:00 =    2.5/s Avg:   100 Min:   100 Max:   100 Err:     0 (0.00%)
   [jmeter] Tidying up ...    @ Mon Jan 20 23:02:31 CST 2020 (1579532551078)
   [jmeter] ... end of run

report:
     [xslt] Processing /root/demo/result/jtl/TestReport.jtl to /root/demo/result/html/TestReport.html
     [xslt] Loading stylesheet /root/SoftWare/Jmeter/apache-jmeter-5.1.1/extras/jmeter.results.shanhe.me.xsl

BUILD SUCCESSFUL
Total time: 5 seconds
[root@wintest demo]#
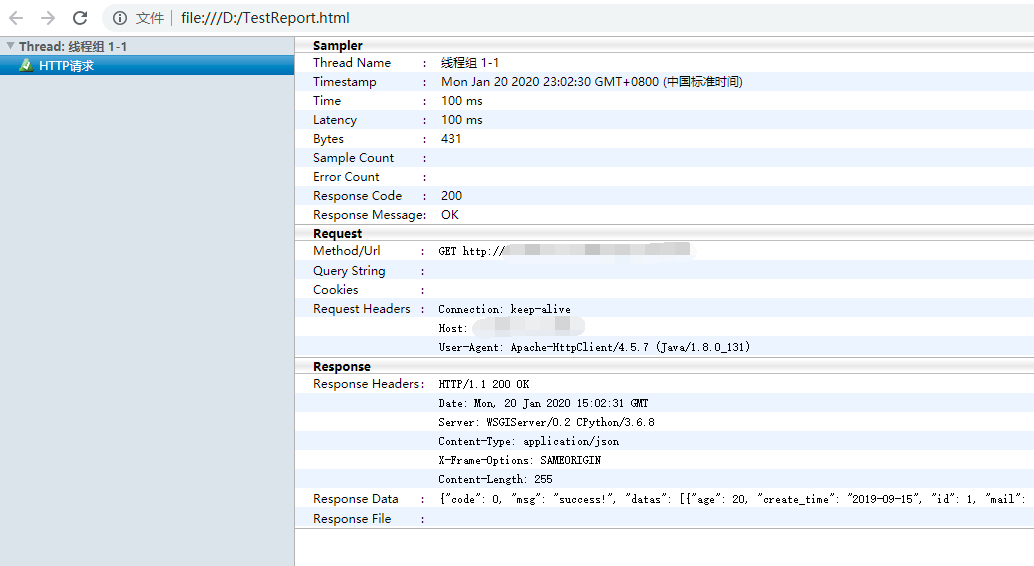
将测试报告传到Windows,在浏览器中查看HTML报告,如下: