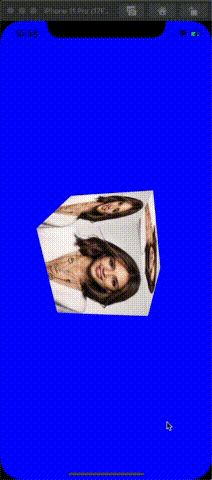
上一篇中我们实现了显示一个图片。这次我们增加点难度,创建一个正方体,将正方体6个面全都贴上纹理并且使其进行旋转。
先看下最终结果:
一、OpenGL ES实现:
上代码:
@interface ViewController ()
{
    EAGLContext *context;
    GLKBaseEffect *cEffect;
    int angle;
}
@end

@implementation ViewController

- (void)viewDidLoad {
    [super viewDidLoad];

    //1.OpenGL ES 相关初始化
    [self setUpConfig];

    //2.加载顶点/纹理坐标数据
    [self setUpVertexData];

    //3.加载纹理数据(使用GLBaseEffect)
    [self setUpTexture];
}

#pragma mark -- OpenGL ES setUp

-(void)setUpTexture
{
    //1.获取纹理图片路径
    NSString *filePath = [[NSBundle mainBundle]pathForResource:@"Jessica Alba" ofType:@"jpg"];

    //2.设置纹理参数
    //纹理坐标原点是左下角,但是图片显示原点应该是左上角.
    NSDictionary *options = [NSDictionary dictionaryWithObjectsAndKeys:@(1),GLKTextureLoaderOriginBottomLeft, nil];

    GLKTextureInfo *textureInfo = [GLKTextureLoader textureWithContentsOfFile:filePath options:options error:nil];

    //3.使用苹果GLKit 提供GLKBaseEffect 完成着色器工作(顶点/片元)
    cEffect = [[GLKBaseEffect alloc]init];
    cEffect.texture2d0.enabled = GL_TRUE;
    cEffect.texture2d0.name = textureInfo.name;

    // 透视投影矩阵
    CGFloat aspect = fabs(self.view.bounds.size.width / self.view.bounds.size.height);
    GLKMatrix4 projectionMatrix = GLKMatrix4MakePerspective(GLKMathDegreesToRadians(65.0), aspect, 0.1, 100.0);
    cEffect.transform.projectionMatrix = projectionMatrix;
}

-(void)setUpVertexData
{
    //1.设置顶点数组(顶点坐标,纹理坐标)
    /*
     纹理坐标系取值范围[0,1];原点是左下角(0,0);
     故而(0,0)是纹理图像的左下角, 点(1,1)是右上角.
     */
    GLfloat vertexData[] = {

        //面向我们第一面:
        -0.5, -0.5, 0.5,     0.0,0.0,
        0.5, -0.5, 0.5,      1.0,0.0,
        0.5, 0.5, 0.5,       1.0,1.0,
        0.5, 0.5, 0.5,       1.0,1.0,
        -0.5, 0.5, 0.5,      0.0,1.0,
        -0.5, -0.5, 0.5,     0.0,0.0,

        //背后的那面
        0.5, -0.5, -0.5,     0.0,0.0,
        -0.5, -0.5, -0.5,    1.0,0.0,
        -0.5, 0.5, -0.5,     1.0,1.0,
        -0.5, 0.5, -0.5,     1.0,1.0,
        0.5, 0.5, -0.5,      0.0,1.0,
        0.5, -0.5, -0.5,     0.0,0.0,

        //左边的那面
        -0.5, -0.5, -0.5,    0.0,0.0,
        -0.5, -0.5, 0.5,     1.0,0.0,
        -0.5, 0.5, 0.5,      1.0,1.0,
        -0.5, 0.5, 0.5,      1.0,1.0,
        -0.5, 0.5, -0.5,     0.0,1.0,
        -0.5, -0.5,-0.5,     0.0,0.0,

        //右边那面
        0.5, -0.5, 0.5,      0.0,0.0,
        0.5, -0.5, -0.5,     1.0,0.0,
        0.5,  0.5, -0.5,     1.0,1.0,
        0.5,  0.5, -0.5,     1.0,1.0,
        0.5, 0.5, 0.5,       0.0,1.0,
        0.5, -0.5,0.5,       0.0,0.0,

        //顶上那面
        -0.5, 0.5, 0.5,      0.0,0.0,
        0.5, 0.5, 0.5,       1.0,0.0,
        0.5, 0.5, -0.5,      1.0,1.0,
        0.5, 0.5, -0.5,      1.0,1.0,
        -0.5, 0.5, -0.5,     0.0,1.0,
        -0.5, 0.5, 0.5,      0.0,0.0,

        //底下那面
        -0.5, -0.5, -0.5,    0.0,0.0,
        0.5, -0.5, -0.5,     1.0,0.0,
        0.5, -0.5, 0.5,      1.0,1.0,
        0.5, -0.5, 0.5,      1.0,1.0,
        -0.5, -0.5, 0.5,     0.0,1.0,
        -0.5, -0.5, -0.5,    0.0,0.0,

    };

    //2.开辟顶点缓存区
    //(1).创建顶点缓存区标识符ID
    GLuint bufferID;
    glGenBuffers(1, &bufferID);
    //(2).绑定顶点缓存区.(明确作用)
    glBindBuffer(GL_ARRAY_BUFFER, bufferID);
    //(3).将顶点数组的数据copy到顶点缓存区中(GPU显存中)
    glBufferData(GL_ARRAY_BUFFER, sizeof(vertexData), vertexData, GL_STATIC_DRAW);

    //3.打开读取通道.

    //顶点坐标数据
    glEnableVertexAttribArray(GLKVertexAttribPosition);
    glVertexAttribPointer(GLKVertexAttribPosition, 3, GL_FLOAT, GL_FALSE, sizeof(GLfloat) * 5, (GLfloat *)NULL + 0);

    //纹理坐标数据
    glEnableVertexAttribArray(GLKVertexAttribTexCoord0);
    glVertexAttribPointer(GLKVertexAttribTexCoord0, 2, GL_FLOAT, GL_FALSE, sizeof(GLfloat) * 5, (GLfloat *)NULL + 3);

}

-(void)setUpConfig
{
    //1.初始化上下文&设置当前上下文
    /*
     EAGLContext 是苹果iOS平台下实现OpenGLES 渲染层.
     kEAGLRenderingAPIOpenGLES1 = 1, 固定管线
     kEAGLRenderingAPIOpenGLES2 = 2,
     kEAGLRenderingAPIOpenGLES3 = 3,
     */
    context = [[EAGLContext alloc]initWithAPI:kEAGLRenderingAPIOpenGLES3];
    //判断context是否创建成功
    if (!context) {
        NSLog(@"Create ES context Failed");
    }
    //设置当前上下文
    [EAGLContext setCurrentContext:context];

    //2.获取GLKView & 设置context
    GLKView *view =(GLKView *) self.view;
    view.context = context;

    //3.配置视图创建的渲染缓存区.
    view.drawableColorFormat = GLKViewDrawableColorFormatRGBA8888;
    view.drawableDepthFormat = GLKViewDrawableDepthFormat16;

    //4.设置背景颜色
    glClearColor(0, 0, 1, 1.0);
}

#pragma mark -- GLKViewDelegate
//绘制视图的内容
/*
 GLKView对象使其OpenGL ES上下文成为当前上下文,并将其framebuffer绑定为OpenGL ES呈现命令的目标。然后,委托方法应该绘制视图的内容。
*/
- (void)glkView:(GLKView *)view drawInRect:(CGRect)rect
{
    glEnable(GL_DEPTH_TEST);
    glClear(GL_COLOR_BUFFER_BIT | GL_DEPTH_BUFFER_BIT);
    [self updateAngle];
    //2.准备绘制
    [cEffect prepareToDraw];
    //3.开始绘制
    glDrawArrays(GL_TRIANGLES, 0, 36);

}

- (void)updateAngle {
    angle = (angle + 3) % 360;
    GLKMatrix4 modelviewMatrix = GLKMatrix4Translate(GLKMatrix4Identity, 0, 0, -4.0);
    modelviewMatrix = GLKMatrix4Rotate(modelviewMatrix, GLKMathDegreesToRadians(angle), 0.3, 0.5, 0.7);
    cEffect.transform.modelviewMatrix = modelviewMatrix;
}
需要注意的几个地方:
setUpTexture中,我们增加了透视投影。这个是为了防止纹理贴图有变形。因为们的给的顶点坐标是按照屏幕的宽高来计算的。
// 透视投影矩阵
    CGFloat aspect = fabs(self.view.bounds.size.width / self.view.bounds.size.height);
    GLKMatrix4 projectionMatrix = GLKMatrix4MakePerspective(GLKMathDegreesToRadians(65.0), aspect, 0.1, 100.0);
    cEffect.transform.projectionMatrix = projectionMatrix;
GLKViewDelegate代理方法:我们增加深度测试,看过之前的甜甜圈案例就应该明白是原因了。同时,开启深度测试的时候,记得清空深度缓冲区,否则有可能显示出错。
glEnable(GL_DEPTH_TEST);
glClear(GL_COLOR_BUFFER_BIT | GL_DEPTH_BUFFER_BIT);
二、CoreAnimation 实现
上代码:
@interface ViewController ()
@property (weak, nonatomic) IBOutlet UIView *contenView;
@end

@implementation ViewController

- (void)viewDidLoad {
    [super viewDidLoad];
    [self configUI];

}
- (void)configUI{
    NSMutableArray <UIImageView* > *imageViews = [NSMutableArray array];

    for (int i = 0; i < 6; i ++) {
        UIImageView *imageView = [[UIImageView alloc]initWithFrame:CGRectMake(0, 0, 150, 150)];
        imageView.image = [UIImage imageWithContentsOfFile:[[NSBundle mainBundle]pathForResource:@"Jessica Alba" ofType:@"jpg"]];
        imageView.center = self.contenView.center;
        [self.contenView addSubview:imageView];
        [imageViews addObject:imageView];
    }
    if (imageViews.count != 6) {
        return;
    }

    //image 1
    CATransform3D transform = CATransform3DMakeTranslation(0, 0, 75);
    imageViews.firstObject.layer.transform = transform;
    //image 2
    transform = CATransform3DMakeTranslation(75, 0, 0);
    transform = CATransform3DRotate(transform, M_PI_2, 0, 1, 0);
    imageViews[1].layer.transform = transform;
    //image 3
    transform = CATransform3DMakeTranslation(0, -75, 0);
    transform = CATransform3DRotate(transform, M_PI_2, 1, 0, 0);
    imageViews[2].layer.transform = transform;

    //image 4
    transform = CATransform3DMakeTranslation(0, 75, 0);
    transform = CATransform3DRotate(transform, -M_PI_2, 1, 0, 0);
    imageViews[3].layer.transform = transform;

    //image 5
    transform = CATransform3DMakeTranslation(-75, 0, 0);
    transform = CATransform3DRotate(transform, -M_PI_2, 0, 1, 0);
    imageViews[4].layer.transform = transform;

    //image 6
    transform = CATransform3DMakeTranslation(0, 0, -75);
    transform = CATransform3DRotate(transform, M_PI, 0, 1, 0);
    imageViews[5].layer.transform = transform;

    __block NSInteger index = 0;
    NSTimer *timer = [NSTimer scheduledTimerWithTimeInterval:1.0/60.0 repeats:YES block:^(NSTimer * _Nonnull timer) {
        index = (index + 3) % 360;
        self.contenView.layer.sublayerTransform = CATransform3DMakeRotation(M_PI / 180.0 * index, -0.3, 0.5, -0.7);
    }];
    [[NSRunLoop mainRunLoop] addTimer:timer forMode:NSRunLoopCommonModes];

}
大概思路就是在一个view上添加6个imageView,然后使用imageView.layer.transform使每一个imageView变成正方体的一个面,然后再利用Timer不停地更新self.contenView.layer.sublayerTransform即可。
觉得不错记得点赞哦!听说看完点赞的人逢考必过,逢奖必中。ღ( ´・ᴗ・` )比心