- 内容输出来源:
拉勾教育Java高新训练营
1、 全局配置文件
Spring Boot支持 application*.properties、application*.yaml和application*.yml三种拓展名结尾的全局配置文件;
- 优先级:
application*.properties>application*.yaml>application*.yml.
口说无凭,有源码为证,
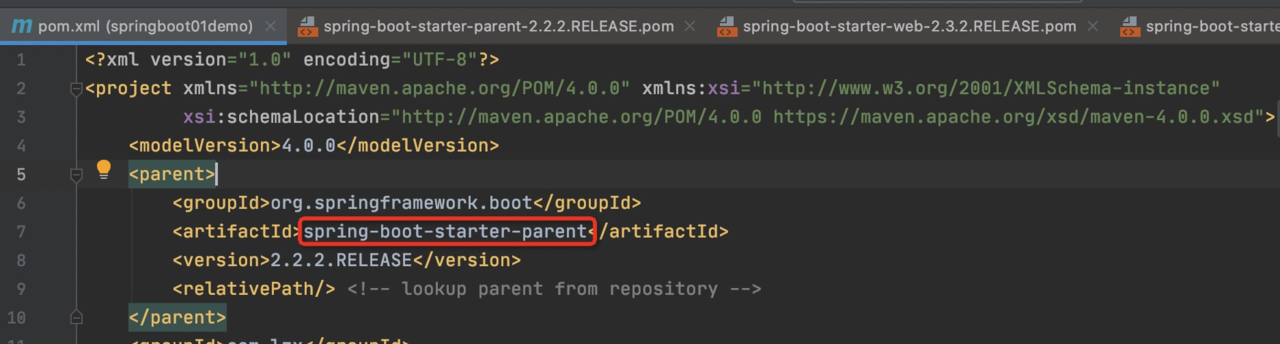
在pom.xml文件中,点进去spring-boot-starter-parent,会发现这样的配置:
    <resource>
        <filtering>true</filtering>
        <directory>${basedir}/src/main/resources</directory>
        <includes>
          <include>**/application*.yml</include>
          <include>**/application*.yaml</include>
          <include>**/application*.properties</include>
        </includes>
      </resource>
1.1. application.properties配置文件
语法:
#配置数字
person.id=1
#配置字符串
person.name=tom
#配置List集合
person.hoby=吃饭,睡觉,打豆豆
#配置String[]数组
person.family=father,mother
#配置map集合
person.map.k1=v1
person.map.k2=v2
#配置对象type属性
person.pet.type=dog
#配置对象name属性
person.pet.name=旺财
1.2. application.y(a)ml配置文件
YAML文件格式是Spring Boot支持的一种JSON超集文件格式,相较于传统的Properties配置文件,YAML以数据为核心,是一种更为直观且更容易被电脑识别的数据序列化格式,application.yml的工作原理和application.properties是一样的。
- YAML文件的拓展名可以是
.yml或者.yaml - application.yml配置文件使用
key:(空格)value格式配置属性,使用缩进控制层级关系
1) value值为普通数据类型(例如:数字、字符串、布尔)
server:
  port: 8081
  path: /hello
2) value值为数组或单列集合
主要有两种写法:**缩进式写法**和**行内式写法**;其中**缩进式写法**又有两种写法:
- 缩进式写法一:
person:
  hobby:
    - play
    - read
    - sleep
- 缩进式写法二:
person:
  hobby:
    play,
    read,
    sleep
- 行内式写法:
person:
  hobby: [play,read,sleep]
3) value值为Map或对象
- 缩进式写法:
person:
  map:
    k1: v1
    k2: v2
- 行内式写法:
person:
  map: {k1: v1, k2: v2}
2、 配置文件属性值注入
使用Spring Boot全局配置文件设置属性时,
- 如果配置的属性是已有属性,例如服务端口server.port,那么Spring Boot会扫描并读取这些配置属性,覆盖已有的默认配置;
- 如果配置的是自定义属性,则还需要在程序中注入这些配置属性方可生效。
Spring Boot提供了多种属性注入的方式,我下面来简单介绍两种,分别是是@ConfigurationProperties和@Values注解。下面我们来分别使用这两种属性注入方式验证一下上文中的配置。
2.1. @ConfigurationProperties属性注入
@ConfigurationProperties注解可以将配置文件中的自定义属性批量的注入到某个Bean对象的多个对应的属性中。
需要注意的是使用@ConfigurationProperties注解进行批量注入时,被注入的Bean比提供公有的setter方法,这是因为@ConfigurationProperties注解底层是使用setter方法进行赋值的。
- 1) 编写需要被注入的类
- Pet类
        package com.lzx.springboot01demo.pojo;

        public class Pet {
            private String type;
            private String name;

            // 省略getter/setter方法
            // 省略toString方法
        }
* Person类
        package com.lzx.springboot01demo.pojo;

        import org.springframework.boot.context.properties.ConfigurationProperties;
        import org.springframework.stereotype.Component;

        import java.util.Arrays;
        import java.util.List;
        import java.util.Map;

        @Component  // 将Person类作为bean注入到Spring容器中
        @ConfigurationProperties(prefix = "person")     // 将配置文件中以person开头的属性注入到该类中
        public class Person {
            private int id;
            private String name;
            private List hobby;
            private String[] family;
            private Map map;
            private Pet pet;

            // 省略getter/setter方法
            // 省略toString方法
        }
- 2) 编写全局配置文件
#配置数字
person.id=1
#配置字符串
person.name=tom
#配置List集合
person.hobby=吃饭,睡觉,打豆豆
#配置String[]数组
person.family=father,mother
#配置map集合
person.map.k1=v1
person.map.k2=v2
#配置对象type属性
person.pet.type=dog
#配置对象name属性
person.pet.name=旺财
编写配置文件过程中发现,不会有任何的提示,这是因为编写的配置属性都是我们自定义的,要想使我们这些自定义的配置也有提示,需要引入一个Spring Boot提供的配置处理器依赖:
<dependency>
    <groupId>org.springframework.boot</groupId>
    <artifactId>spring-boot-configuration-processor</artifactId>
    <optional>true</optional>
</dependency>
- 3) 总结
@ConfigurationProperties(prefix = "person")的作用是将配置文件中以person开头的属性注入到该类对应的属性中@Component的作业是将Person类作为bean注入到Spring容器中,只有这样,才能被@ConfigurationProperties注解进行赋值
2.2. @Values属性注入
@Value是Spring框架提供的注解,用来读取配置文件中的属性并逐个注入到Bean对象对应的属性中,Spring Boot框架对Spring框架的@Value注解进行了默认继承。
@Value注解不仅可以将配置文件中的属性注入到对应的类的属性中,还可以直接给属性赋值,当然,这种方式一般情况下不常用,应为我们可以直接将属性初始化,何必用@Value注入多此一举呢。
使用@Value注解注入不需要提供setter方法。
- 使用@Value注入
package com.lzx.springboot01demo.pojo;

import org.springframework.beans.factory.annotation.Value;
import org.springframework.stereotype.Component;

@Component
public class Student {

    @Value("${person.id}")
    private int id;
    @Value("${person.name}")
    private String name;

    // 省略toString()
}
- 测试
package com.lzx.springboot01demo;

import com.lzx.springboot01demo.pojo.Student;
import org.junit.jupiter.api.Test;
import org.junit.runner.RunWith;
import org.junit.runners.JUnit4;
import org.springframework.beans.factory.annotation.Autowired;
import org.springframework.boot.test.context.SpringBootTest;
import org.springframework.test.context.junit4.SpringRunner;

@RunWith(SpringRunner.class)
@SpringBootTest
class Springboot01demoApplicationTests {

    @Autowired
    private Student student;

    @Test
    public void testValue() {
        System.out.println(student);
    }
}
- 测试打印结果
Student{id=1, name='tom'}
3、 自定义配置
3.1. 使用@PropertySource加载配置文件
- 自定义配置文件
test.id=100
test.name=lucy
- 自定义属性注入类
package com.lzx.springboot01demo.pojo;

import org.springframework.boot.context.properties.ConfigurationProperties;
import org.springframework.boot.context.properties.EnableConfigurationProperties;
import org.springframework.context.annotation.Configuration;
import org.springframework.context.annotation.PropertySource;

@Configuration      // 自定义配置类
@PropertySource("classpath:test.properties")    // 指定自定义配置文件位置和名称
@EnableConfigurationProperties(MyProperties.class)      // 开启对应配置类的属性注入功能
@ConfigurationProperties(prefix = "test")       // 指定配置文件注入属性前缀
public class MyProperties {

    private Integer id;
    private String name;

    // 省略getter/setter方法
    // 省略toString()方法
}
- 测试
    @Autowired
    private MyProperties myProperties;

    @Test
    public void testMyProperties() {
        System.out.println(myProperties);
    }
- 打印结果
MyProperties{id=100, name='lucy'}
- 总结
@Configuration注解表示当前类是一个自定义配置类,并添加为Spring容器的组件,也可使用传统的@Component注解@PropertySource("classpath:test.properties")指定自定义配置文件位置和名称@ConfigurationProperties(prefix = "test")指定将配置文件中前缀为test的属性注入到配置类的属性中@EnableConfigurationProperties(MyProperties.class)表示开启对应配置类的属性注入功能,如果配置类上使用的是@Component注解而非@Configuration,@EnableConfigurationProperties(MyProperties.class)注解可以省略
3.2. 使用@Configuration编写自定义配置类
- 编写自定义配置类
package com.lzx.springboot01demo.config;

public class MyService {
}
package com.lzx.springboot01demo.config;

import org.springframework.context.annotation.Bean;
import org.springframework.context.annotation.Configuration;

@Configuration
public class MyConfig {

    @Bean
    public MyService myService() {
        return new MyService();
    }
}
- 测试
    @Autowired
    private ApplicationContext applicationContext;

    @Test
    public void iocTest() {
        System.out.println(applicationContext.containsBean("myService"));
    }
- 打印结果
true
- 总结
@Configuration注解表示这是一个自定义配置类,该配置类会被Spring Boot自动扫描识别@Bean注解作用在myService()方法上,会将返回值new MyService()对象作为组件添加到Spring容器中,默认ID是方法名myService
4、 随机数设置和参数间引用
4.1. 随机数设置
在Spring Boot配置文件中,可以使用Spring Boot内嵌的RandomValuePropertySource类进行随机值注入。
其语法为${random.xx}。
# 配置随机值
my.secret=${random.value}
# 配置随机整数
my.number=${random.int}
# 配置随机long类型的整数
my.bigbumber=${random.long}
# 配置uuid
my.uuid=${random.uuid}
# 配置小于10的整数
my.number.less.than.ten=${random.int(10)}
# 配置范围在[1024,65536]的随机整数
my.number.in.range=${random.int[1024,65536]}
4.2. 参数间引用
在Spring Boot配置文件中还可以进行参数间引用,也就是后一个属性配置,可以直接引用之前已经定义过的属性。
参数间引用的语法格式为${xx},其中xx便是之前定义好的属性名。
# 参数间引用
app.name=MyApp
app.description=${app.name} is a Spring Boot application