 搜云库技术团队
mybatis升级案例之CRUD操作
一、准备工作
1.新建maven工程,和入门案例一样
主要步骤如下,可参考mybatis入门实例
a.配置pom.xml文件
b.新建实例类User、DAO接口类IUserDao
c.新建主配置文件SqlMapConfig.xml,映射配置文件IUserDao.xml,log4j配置文件log4j.properties
d.新建测试类MybatisTest,这里不再采用main函数运行,而是测试函数,代码如下:
public class MybatisTest {

    private InputStream in;
    private SqlSession sqlSession;
    private IUserDao userDao;

    @Before//用于在测试方法执行之前运行
    public void init() throws IOException {
        //1.读取配置文件,生成字节输入流
        in = Resources.getResourceAsStream("SqlMapConfig.xml");
        //2.获取SqlSessionFactory对象
        SqlSessionFactory factory = new SqlSessionFactoryBuilder().build(in);
        //3.获取SqlSession对象
        sqlSession = factory.openSession();
        //4.获取dao的代理对象
        userDao = sqlSession.getMapper(IUserDao.class);
    }

    @After//用于在测试方法执行之后运行
    public void close() throws IOException {
        //5.提交事务
        sqlSession.commit();
        //6.释放资源
        sqlSession.close();
        in.close();
    }

    /**
     * 测试查询所有
     */
    @Test
    public void testFindAll() throws IOException {
        //执行查询所有方法
        List<User> users = userDao.findAll();
        for (User user : users) {
            System.out.println(user);
        }
    }
}
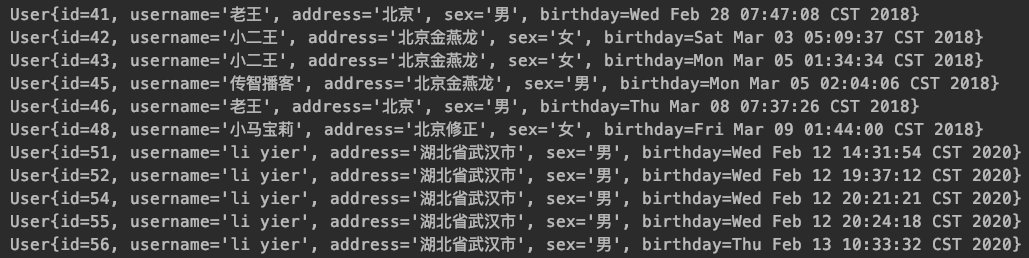
2.运行结果
3.测试函数分析
由于采用单元测试的方式,所以要在测试函数处加上@Test注解,@Before注解表示在测试方法之前执行,@After注解表示在每一个测试方法之后都执行一次。因此,本案例中方法执行顺序为:@Before -> @Test -> @After。关于JUnit注解,可以参考:[JUnit4中@Before、@After、@Test等注解的作用
二、最基本的增删改查操作
1.在IUserDao接口中添加如下方法
/* 保存用户 */
void saveUser(User user);

/* 更新用户 */
void updateUser(User user);

/* 根据用户Id删除用户 */
void deleteUser(Integer userId);

/* 根据用户Id查询用户 */
User findById(Integer useId);
2.配置映射配置文件IUserDao.xml
<!-- 配置保存用户 -->
<insert id="saveUser" parameterType="domain.User">
    insert into user(username, address,sex, birthday)
    values(#{username}, #{address},#{sex},#{birthday})
</insert>

<!-- 配置更新用户 -->
<update id="updateUser" parameterType="domain.User">
    update user set username = #{username}, address = #{address},
    sex = #{sex}, birthday = #{birthday} where id = #{id}
</update>

<!-- 配置删除用户 -->
<delete id="deleteUser" parameterType="Integer">
    delete  from user  where id = #{id}
</delete>

<!-- 配置根据Id查询用户 -->
<select id="findById" parameterType="Integer" resultType="domain.User">
    select *  from user  where id = #{id}
</select>
parameterType属性表示参数类型,resultType属性表示返回值类型。基本类型的写法比较随意,例如Int、Integer、java.lang.Integer,并且类名不区分大小写。实体类类型必须是全限定类名,区分大小写。
sql 语句中使用#{}字符: 它代表占位符,相当于 jdbc 的prepareStatement中的?,都是用于执行语句时替换实际的数据。具体的数据是由#{}里面的内容决定的。
#{}中内容的写法: 如果数据类型是基本类型,此处可以随意写,例如根据Id查询用户中,内容可以是任意字符。对于保存用户而言,参数类型是一个User对象,此处要写User对象中的属性名称,这里用的是ognl表达式。
3.在测试类中添加测试方法
/**
 * 测试保存用户
 * @throws IOException
 */
@Test
public void testSaveUser() throws IOException {
    User user = new User();
    user.setUsername("li yier");
    user.setAddress("湖北省武汉市");
    user.setSex("男");
    user.setBirthday(new Date());
    userDao.saveUser(user);
}

/**
 * 测试更新用户
 * @throws IOException
 */
@Test
public void testUpdateUser() throws IOException {
    User user = new User();
    user.setId(50);
    user.setUsername("li san");
    user.setAddress("湖北省武汉市");
    user.setSex("男");
    user.setBirthday(new Date());
    userDao.updateUser(user);
}

/**
 * 测试删除用户
 * @throws IOException
 */
@Test
public void testDeleteUser() throws IOException {
    userDao.deleteUser(49);
}

/**
 * 测试根据用户ID查询用户
 * @throws IOException
 */
@Test
public void testFindById() throws IOException {
    User user = userDao.findById(50);
    System.out.println(user);
}
4.为什么在close方法中需要提交事务
openSession方法中,除非传入boolean autoCommit=true,否则默认都是false。也就是说,不会自动提交事务,在执行close方法的时候就会造成事务回滚。详解请参考mybatis JDBC事务细节
三、模糊查询和增加用户获取id
1.在IUserDao接口中添加如下方法
/* 根据名称模糊查询用户信息 */
List<User> findByName(String username);

/* 查询总的用户数 */
int findTotal();
2.配置映射配置文件IUserDao.xml
<!-- 配置保存用户 -->
<insert id="saveUser" parameterType="domain.User">
    <!-- 配置插入用户后,获取用户id -->
    <selectKey keyProperty="id" keyColumn="id" resultType="Integer" order="AFTER">
            select last_insert_id();
    </selectKey>
    insert into user(username, address,sex, birthday)
    values(#{username}, #{address},#{sex},#{birthday})
</insert>

<!-- 配置根据名称模糊查询用户 -->
<select id="findByName" parameterType="String" resultType="domain.User">
    <!-- select *  from user  where username like #{name} -->
    select *  from user  where username like '%${value}%'
</select>

<!-- 配置查询总的用户数 -->
<select id="findTotal" resultType="Integer">
    select count(id) from user
</select>
3.在测试类中添加测试方法
/**
 * 测试保存用户
 * @throws IOException
 */
@Test
public void testSaveUser() throws IOException {
    User user = new User();
    user.setUsername("li yier");
    user.setAddress("湖北省武汉市");
    user.setSex("男");
    user.setBirthday(new Date());
    System.out.println("插入数据库之前:" + user);
    userDao.saveUser(user);
    System.out.println("插入数据库之后:" + user);
}

/**
 * 测试根据名称模糊查询用户
 * @throws IOException
 */
@Test
public void testFindByName() throws IOException {
    //List<User> users = userDao.findByName("%王%");
    List<User> users = userDao.findByName("王");
    for (User user : users
    ) {
        System.out.println(user);
    }
}

/**
 * 测试根据查询用户记录条数
 * @throws IOException
 */
@Test
public void testFindTotal() throws IOException {
    int total = userDao.findTotal();
    System.out.println("用户总数为:" + total);
}
4.代码分析
1、添加用户时,如何获取用户id
新增用户后,同时还要返回当前新增用户的 id 值,因为 id 是由数据库的自动增长来实现的,所以就相当于我们要在新增后将自动增长 auto_increment 的值返回。使用selectKey标签,keyProperty表示实体类属性,keyColumn表示数据库列名,resultType表示返回值类型,order表示执行顺序。此时执行测试方法,就会发现插入数据库之前user.id为null,插入之后user.id为数据库自动增长的id值。
2、模糊查询的几种写法
第一种是类似于占位符的写法:select * from user where username like #{name},此时执行测试函数时,传入的参数必须带有%(因为是模糊查询),即List
第二种是字符串拼接的写法:select * from user where username like ‘%${value}%’, 此时执行测试函数时,传入的参数不用带有%,即List
四、使用实体类封装查询条件
在执行查询时,有时候我们的查询条件有多个复杂的参数,这时候我们可以把这些参数封装到一个pojo对象中执行查询。关于pojo对象,可以参考java的几种对象(PO,VO,DAO,BO,POJO,DTO)解释。这里我们以根据用户名查询用户信息为例,查询条件放到 QueryVo 的 user 属性中。
1.新建pojo类
public class QueryVo {
    private User user;

    public User getUser() {
        return user;
    }

    public void setUser(User user) {
        this.user = user;
    }
}
2.配置映射配置文件IUserDao.xml
<!-- 配置根据封装pojo对象查询用户 -->
<select id="findUserByVo" parameterType="domain.QueryVo" resultType="domain.User">
     select *  from user where username like #{user.username}
</select>
3.在测试类中添加测试方法
/**
 * 测试根据封装pojo对象进行查询
 * @throws IOException
 */
@Test
public void testFindByVo() throws IOException {
    QueryVo vo = new QueryVo();
    User u = new User();
    u.setUsername("%王%");
    vo.setUser(u);
    List<User> users = userDao.findUserByVo(vo);
    for (User user : users
    ) {
        System.out.println(user);
    }
}
4.查询结果与模糊查询一致

五、实体类属性和数据库列名不一致问题
在之前的案例中,总是保持实体类属性和数据库列名一致,但是在实际开发中,总会有实体类属性和数据列名不一致的情况。如果将User类所有属性之前都加上user,例如id改为userId。由于在查询时,我们将查询结果封装到实体类时,采用了反射技术,如果不知道准确的实体类属性名时,就无法封装到实体类对象中。对于这种情况,我们有两种解决方式。
1.修改sql语句
可以在sql语句中给列名起别名,例如映射配置文件IUserDao.xml中查询所有方法的配置可以改为:
    <!-- 配置查询所有 -->
    <select id="findAll" resultType="domain.User">
        <!-- 用给列名起别名的方式解决实体类属性名和数据库列名不一致的问题,此方法查询较快 -->
        select id as userId, username as userName, address as userAddress, sex as userSex,
        birthday as userBirthday from user;
    </select>
2.在映射配置文件IUserDao.xml中指定实体类属性和数据库列名的映射关系
<!-- 配置数据库的列名和实体类的属性名的对应关系 -->
<resultMap id="userMap" type="domain.User">
    <!-- 配置主键 -->
    <id property="userId" column="id"></id>
    <!-- 配置非主键 -->
    <result property="userAddress" column="address"></result>
    <result property="userSex" column="sex"></result>
    <result property="userBirthday" column="birthday"></result>
</resultMap>
property表示实体类属性名,column表示数据库列名。当指定映射关系之后,查询所有方法的配置,应该改为:
<!-- 配置查询所有 -->
<select id="findAll" resultMap="userMap">
     select * from user;
</select>
这里不再使用resultType属性,而是resultMap属性。这种方法较直接更改sql语句而言执行相对较慢,因为多了一步对xml文件resultMap属性的解析。
六、重要的标签使用
在主配置文件SqlMapConfig.xml中,有一些标签可以简化我们的代码。主要有以下:
1.properties标签
在配置环境时,我们需要配置mysql的连接池信息。原始配置如下:
<!-- 配置环境 -->
<environments default="mysql">
    <!-- 配置mysql的环境 -->
    <environment id="mysql">
        <!-- 配置事务 -->
        <transactionManager type="jdbc"></transactionManager>
        <!-- 配置连接池 -->
        <dataSource type="POOLED">
            <property name="driver" value="com.mysql.cj.jdbc.Driver"/>
            <property name="url" value="jdbc:mysql://localhost:3306/mybatis"/>
            <property name="username" value="root"/>
            <property name="password" value="12345678"/>
        </dataSource>
    </environment>
</environments>
在SqlMapConfig.xml中配置properties标签,有两种方式:
1、通过resource属性引用外部配置文件信息
我们可以将连接池的相关信息放在一个文件中,然后指定相关信息即可。例如,在resource目录下,新建名为jdbcConfig.properties的文件,内容如下:
driver=com.mysql.cj.jdbc.Driver
url=jdbc:mysql://localhost:3306/mybatis
username=root
password=12345678
在SqlMapConfig.xml中添加properties标签如下:
 <!-- 配置properties -->
    <!-- 方法一:通过resource属性引用外部配置文件信息,resource属性用于指定配置文件的位置,
         并且必须存在于类路径下 -->
    <properties resource="jdbcConfig.properties">
    </properties>
2、在标签内部配置链接数据库的信息
    <properties>
                <property name="driver" value="com.mysql.cj.jdbc.Driver"/>
                <property name="url" value="jdbc:mysql://localhost:3306/mybatis"/>
                <property name="username" value="root"/>
                <property name="password" value="12345678"/>
    </properties>
配置properties标签之后,就可以将mysql的连接池信息更改为:
<!-- 配置环境 -->
<environments default="mysql">
    <!-- 配置mysql的环境 -->
    <environment id="mysql">
        <!-- 配置事务 -->
        <transactionManager type="jdbc"></transactionManager>
        <!-- 配置连接池 -->
        <dataSource type="POOLED">
            <property name="driver" value="${driver}"/>
            <property name="url" value="${url}"/>
            <property name="username" value="${username}"/>
            <property name="password" value="${password}"/>
        </dataSource>
    </environment>
</environments>
2.typealias标签
typealias标签可以用于给实体类取别名,type属性指的是实体类全限定类名,alias属性指定别名,当指定别名后,就不再区分别名的大小写。当配置别名后,在映射配置文件IUserDao.xml中,参数类型不再需要写全限定类名,只需要写别名即可。定义别名有两种方式:
1、单个别名定义:
    <!-- 使用typeAliases配置别名,只能给实体类(domain包下的类)取别名 -->
    <typeAliases>
        <!-- typeAlias用于配置别名,type属性指的是实体类全限定类名,alias属性指定别名
             当指定别名后,就不再区分别名的大小写 -->
                    <typeAlias type="domain.User" alias="user"></typeAlias>
    </typeAliases>
2、批量别名定义:需要用到package标签
    <!-- 使用typeAliases配置别名,只能给实体类(domain包下的类)取别名 -->
    <typeAliases>
        <!-- package用于指定要配置别名的包,当指定之后,该包下的实体类都会注册别名,类名就是别名
        并且不再区分别名的大小写 -->
        <package name="domain"/>
    </typeAliases>
当定义别名后,IUserDao.xml中的全限定类名domain.User可以更改为user,从而简化代码。
3.mappers标签中的package
在主配置文件SqlMapConfig.xml中,需要通过mappers标签来指定映射配置文件的位置,有三种方式。
1、如果是通过xml文件的形式来配置,则应该如下配置:
<!-- 配置映射文件的位置,使用相对于类路径的资源 -->
<mappers>
    <mapper resource="dao/IUserDao.xml"></mapper>
</mappers>
2、如果是通过注解的形式来配置,则应该如下配置:
<!-- 配置映射文件的位置,使用 mapper 接口类路径 -->
<mappers>
    <mapper class="dao.IUserDao"></mapper>
</mappers>
3、通过package标签来配置
    <!-- 配置映射文件的位置,注册指定包下的所有mapper接口 -->
    <mappers>
     <!-- 此处的package标签用于指定dao接口所在的包,当指定完成后,就不再需要mapper、resource和class -->
        <package name="dao"/>
    </mappers>
注意:方法2和方法3要求 mapper 接口名称和 mapper 映射文件名称相同,且放在同一个目录中。

